October 29, 2013

We Got Game!

We were fortunate to be given a great treat from a friend--a venison tenderloin.  While thinking of ways we could highlight the natural flavors of this protein, without overcooking it, I was inspired by a family Fall favorite from my childhood.

We decided to do a refined take on a mushroom Swiss steak.  Since we had chilly weather here in DC last week, it was the perfect time to make this hearty dish.  And since our cut of meat was super lean, this method of cooking, which involves tenderizing and braising it, really helps to create steak that melts in your mouth.  Start by taking any silver skin off of your meat.  It is tough, chewy connective tissue that you don't want.  Simply pull up the membrane and use the tip of a boning knife to gently slice it free from the meat as you pull it away.
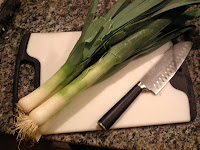
The other thing to prep ahead of time is the leeks.  As we always do, slice them up and toss them in a bowl of water to clean out the dirt and grit.  Since there are so many layers, the dirt can get trapped between them.  In the bowl of water, the dirt will sink to the bottom, and your leeks will be clean.
Now for the fun part.  Slice the loin into filets, season, and then pound them flat.  Don't be afraid to give 'em a good whack.  You can place a piece of plastic wrap over them to prevent meat wads from flying off your cutting board.  Then lightly dredge them in a little AP flour.  Be sure to shake off any excess.
Once you've got them nice and coated brown them up in your dutch oven or slow cooker.  You just want to get a little crust on them.  They will braise for a long time so you really just want a sear on them.
Remove your steaks from the dutch oven, and set them aside. Melt some butter in the dutch oven, and toss in some freshly chopped rosemary.  Be sure to scrape up any loose brown bits of meat juices and flour.  Then add in some onions, celery, and carrots---and you got a mirepoix going.  Let them soften until they become fragrant. 
Once the mirepoix has cooked down add your leeks and 'shrooms.  Once the mushrooms have released their liquid, season the mixture with salt and pepper, and they will reabsorb it again.  At this time, add in your beef stock. Turn it down to low and add back your steaks.
Now here is the hardest part...the waiting.  Keep your temperature low and braise your meat for at least an hour per pound.  You can let it go longer and it will get more tender as the muscle and connective tissue continue to break down.  Once your meat is nice and tender, you just need to thicken up your mushroom gravy.  We used a slurry of flour and water, and a little bit of heavy cream.
We paired this meal with buttery, roasted garlic mashed potatoes, and a little fresh flat leaf parsley to garnish.  The venison was amazingly tender, and the natural gaminess and earthiness of the mushrooms were so comforting as they ruminate in the gravy and buttery spuds.

Now I know we usually don'y post recipes, but I worked one up to share with my mom and sister:

4 tablespoons butter
1 tablespoon olive oil 
1 cup sliced leeks
2 cloves garlic
2 stalks celery diced
2 small carrots diced
1 medium onion diced
2 bay leaves
1 teaspoon rosemary
1 teaspoon italian parsley
1 1/2 pounds sliced mushrooms (I used cremini) 
3 Tbsp all purpose flour plus some extra for dreging beef steaks
3 cups low-sodium beef broth
1 Tbsp balsamic vinegar
1/2 cup heavy cream 

October 24, 2013

Simple Seasonal Snack

This season when you're carving up your pumpkin, be sure to save all those delicious seeds.  They're one of my favorite things about carving pumpkins for Halloween.  They make a super delicious, easy snack.

As you're cleaning out the guts, put all the seeds into a colander.  Our seeds came from the sugar pumpkin we used to make our ice cream!  Make sure they don't have any guts attached to them.  I like to give them a good rinse to get that slimy feelings off of them.
 Pat them dry, and spread them out on a baking sheet.  I seasoned these with salt, pepper, and a little smoked paprika, but you can season them however you like.
 Then just pop them into the oven for about 10 minutes.  Keep your eye on them so they don't burn.
If you aren't going to eat them right away, you can transfer them to a airtight container for safe keeping.  Just be sure to let them cool completely before putting the lid on.  If you put the lid on while they're still warm, they'll sweat in the container and they'll lose their crunch, and become tough.  No one wants that.

October 21, 2013

Pumpkin--get in everything I eat from October 1st til Thanksgiving!!!

This time of year, pumpkin seems to be everywhere...lattes, pies, soups, breads...you name it, there's a version with pumpkin.  We decided to take our little sugar pumpkin, and turn him into some delicious ice cream sundaes!
You'll want to start by making your pumpkin puree.  Cut your pumpkin in half and clean out all the guts.  I like to save the seeds so I can toast them up for a snack.  So if you want to do that, put the seeds in a bowl, and toss all the stringy guts.

Once the insides are nice and clean, place the halves on a baking sheet, cut side down.  You'll also want to put some water in your pan so it can steam the pumpkin.  Make sure water gets underneath your pumpkin as well.  Pop 'em in a 400 degree oven, and let them roast for about 20 minutes.  When you pull them out, they should be nice and soft.
Once they're cool enough to handle, scrape out the insides into a bowl.  The meat should easily pull away from the skin.  Then we just used the immersion blender to make a silky smooth puree.
For the ice cream base, we used the same recipe for the base that we used in our 100th post.  We made about half of the recipe, and added in a cinnamon stick and a few cloves, and used a vanilla bean, rather than vanilla extract.
While the cream was simmering, and the spices steeping, you'll want to whip up your egg yolks and sugar.
Once the cream mixture came to a simmer, we removed the cinnamon stick and cloves, and tempered it into the egg yolks and sugar mixture.  Then we added about 1 cup of the pumpkin puree.
That's it!  Your base is ready.  You can just follow the directions on your ice cream maker, and you'll have pumpkin ice cream in no time!
Once our ice cream was churned to our liking, we removed it from the ice cream maker, and stored it in the freezer while we made our sundae toppings.
We toasted up some pepitas to top our sundaes, in place of nuts.
And Justin got to work making some caramel.  Start by melting some sugar in a pan.  We used a combination of raw sugar and brown sugar.
Once your sugar has melted, add in some butter.
Then add in some cream.  Be sure you continue to stir it so your caramel doesn't burn.
Once it's thickened, you're ready to go!  You may want to let it cool a little bit before topping your sundae.

Now, just build your sundae.  We had some leftover maple whipped cream, so we put a dollop on top of our ice cream.  Then sprinkled on the toasted pepitas and caramel.
It was the perfect Fall dessert!  Look for more posts that pumpkin up the volume coming soon.

October 13, 2013

Shrimply Irresistible!

We keep seeing those Buitoni pasta commercials, advertising an easy date night dinner of shrimp scampi.  The guy rips open the bag of pasta and shrimp and dumps it into a pan, and voila!  "Homemade" date night dinner, lit candles and all.  After much joking about having Buitoni shrimp scampi for dinner, we decided to make our version of date night shrimp pasta.  Shrimp primavera was definitely our inspiration here, despite it being Fall.

The most time consuming part is cleaning the shrimp, and even then, you can just buy shrimp that are already shelled and cleaned.  But if you're like us and buy the shell-on shrimp, you'll need to peel and devein your shrimp.  At the very least, take out the main vein on the back side.    Just run a paring knife down the back, run it under some water, and you're done.  No one wants to eat shrimp poop!

While Justin was cleaning the shrimp, I got to chopping up some onion, garlic, and tomatoes for our sauce.  We had a couple small beefsteak tomatoes and some yellow romas from our share, but you can use whatever you have on hand.  We just let them cook down and release their juices.  If you have grape or cherry tomatoes on hand, as an alternative, throw them on a backing sheet and pop them in the oven to roast.  Once they start to pop, pull them out, and then just smash them with a potato masher for a nice, roasted tomato sauce.

But back to our sauce.  We poured a little white wine, Italian sauvignon blanc to be exact, into the pan to deglaze it, and get all those tasty bits off the bottom of the pan.  Don't forget to cook your pasta while your sauce is cooking.  The shrimp don't take long to cook up, so toss them into your sauce when your pasta is almost al dente.  Since we still wanted some bit to our asparagus, we threw them in with the shrimp.
When your pasta is done, reserve some of the starchy cooking liquid.  Justin wanted to be absolutely sure the pasta was done, so he threw some on the cabinet...it was done!
Once your shrimps are nice and pink, add in a bit of the pasta water and give it a good stir, before tossing in your pasta.
Give it a good toss so all of the pasta is coated in your sauce.  We topped ours with some fresh chopped parsley and basil, and some parmesan cheese.  And to accompany our pasta, we threw together a Fall salad of mixed greens, apple, toasted walnuts, blue cheese, and a cranberry balsamic vinaigrette.
Date night dinners can still be easy without coming from a bag!

October 9, 2013

Hey, Ho! Chorizo!

I know we've been a little quiet over here at 2 Hungry Hearts, but we've been trying to unpack and dig ourselves out from underneath all these moving boxes.  We managed to tackle the kitchen first, and make enough space so that we could start cooking again.  Fortunately the timing worked out pretty well since we're in between CSA share seasons, and have another couple weeks before the Fall CSA starts up.

To christen our new kitchen, we decided to whip up a quick and easy frittata.  Frittatas are a great way to clean out the fridge and use up those little bits of veggies that you have left in your fridge.  We went with a Spanish-inspired frittata, filling ours with chorizo, kale and manchego cheese.  To compliment the frittata, we made some purple potato homefries and a simple salad.

We got the potatoes going first, dicing them up along with some onions and garlic.  You can throw them all in the pan together and let them cook up.  It will take a little while for the potatoes to get crisp on the outside, so you'll want to start these first.  We cooked ours in a little olive oil, and added some salt, pepper, crushed red pepper, and some smoked paprika, which paired quite nicely with the chorizo.
So while your potatoes are cooking, you can get to work on the frittata.  It's best to use a pan that you can also stick in the oven.  We started by browning up our chorizo.
Once that was cooked, we removed the meat from the pan, poured out some of the excess grease, and then tossed in our kale.
While the kale was sauteing, I whipped up about 7 eggs and grated in some manchego cheese.  As soon as the kale was wilted, we added the chorizo back in, and added the egg mixture.  Once the eggs have set in the bottom of the pan, you'll want to pop the whole pan into the oven.  The twist here was that we added some sliced tomatoes on top and let them roast in the oven, along with some extra cheese!
After about 8 minutes, our frittata was cooked through, and we were ready to eat!
The smokiness of the chorizo was balanced out nicely by the acidity of the roasted tomato.  It was a quick and easy meal that would also make an excellent brunch item.