Showing posts with label dessert. Show all posts

October 21, 2013

Pumpkin--get in everything I eat from October 1st til Thanksgiving!!!

This time of year, pumpkin seems to be everywhere...lattes, pies, soups, breads...you name it, there's a version with pumpkin.  We decided to take our little sugar pumpkin, and turn him into some delicious ice cream sundaes!
You'll want to start by making your pumpkin puree.  Cut your pumpkin in half and clean out all the guts.  I like to save the seeds so I can toast them up for a snack.  So if you want to do that, put the seeds in a bowl, and toss all the stringy guts.

Once the insides are nice and clean, place the halves on a baking sheet, cut side down.  You'll also want to put some water in your pan so it can steam the pumpkin.  Make sure water gets underneath your pumpkin as well.  Pop 'em in a 400 degree oven, and let them roast for about 20 minutes.  When you pull them out, they should be nice and soft.
Once they're cool enough to handle, scrape out the insides into a bowl.  The meat should easily pull away from the skin.  Then we just used the immersion blender to make a silky smooth puree.
For the ice cream base, we used the same recipe for the base that we used in our 100th post.  We made about half of the recipe, and added in a cinnamon stick and a few cloves, and used a vanilla bean, rather than vanilla extract.
While the cream was simmering, and the spices steeping, you'll want to whip up your egg yolks and sugar.
Once the cream mixture came to a simmer, we removed the cinnamon stick and cloves, and tempered it into the egg yolks and sugar mixture.  Then we added about 1 cup of the pumpkin puree.
That's it!  Your base is ready.  You can just follow the directions on your ice cream maker, and you'll have pumpkin ice cream in no time!
Once our ice cream was churned to our liking, we removed it from the ice cream maker, and stored it in the freezer while we made our sundae toppings.
We toasted up some pepitas to top our sundaes, in place of nuts.
And Justin got to work making some caramel.  Start by melting some sugar in a pan.  We used a combination of raw sugar and brown sugar.
Once your sugar has melted, add in some butter.
Then add in some cream.  Be sure you continue to stir it so your caramel doesn't burn.
Once it's thickened, you're ready to go!  You may want to let it cool a little bit before topping your sundae.

Now, just build your sundae.  We had some leftover maple whipped cream, so we put a dollop on top of our ice cream.  Then sprinkled on the toasted pepitas and caramel.
It was the perfect Fall dessert!  Look for more posts that pumpkin up the volume coming soon.

August 5, 2013

It's Pie Style, Jack!

About 2 months ago, Justin decided that I should bake him weekly pies.  I'm not really sure where he got the idea that I would agree to this, especially considering my aversion to baking, but every time we get berries in our share, he suggests I bake him a pie.

On top of this, we've been watching Next Food Network Star, and a Baltimore/DC local, Rodney Henry, owner of Dangerously Delicious Pies, is on of the finalists.  He's spreading his love of pie, and "pie style" across the country, and if you haven't already, you should cast your vote for him to get his own show.  He's quite entertaining.  So not only was this dessert to curb Justin's frequent request for pie, but it is also an ode to Rodney Henry!

I came across this recipe for individual cobblers, and thought they would be much easier than a pie.  There's only two of us...and we don't need an entire pie...so why not make individual desserts?  With a little sweet talking, Justin agreed.

Since we'd already used our blackberries in our pancakes, we used blueberries for the cobblers. Just toss your blueberries with a bit of sugar, and let them sit in your ramekins while you mix up the topping.

For the batter, whisk together your dry ingredients (flour, sugar, baking powder & salt), and then gradually add in your wet ingredients (egg, milk, vanilla, & melted butter).
You'll end up with a pretty thick batter.  You'll want to pour this over the top of your berries.  We also added a dash of sugar, cinnamon and nutmeg on top.
Then just pop them into a 350 degree oven for about 35 minutes, or until the crust gets golden brown.  Now here's where things started to go a bit awry.  We got a little greedy when it came to filling our ramekins, and we'd formed a little mound.  So when the batter started to cook, instead of forming a nice crust on top, it just melted down into all the crevices between the berries.  So our cobbler turned into more of a baked berry compote.
With a dollop of ice cream on top, it still ended up being a tasty dessert.

May 29, 2013

Summertime Sweets

Tonight's dinner was super simple...we threw some steaks on the grill and mixed up a simple salad (for those of you at home playing the 2 Hungry Hearts drinking game, take a drink every time we make a simple salad) of green leaf lettuce and sliced fennel...all items from our share.  We topped the salad with some toasted walnuts, and dressed it with olive oil, white balsamic vinegar, some thyme and fennel fronds.  The sweetness of the white balsamic balanced out the fennel quite nicely.

But let's get on to the main event.  If you thought the salad and steak were easy, wait till you feast your eyes on this dessert.  It couldn't be simpler!

We only had 2 stalks of rhubarb, so we tossed in some quartered strawberries too.  Strawberries and rhubarb are a winning combination; the sweetness of strawberries balancing out the tartness of rhubarb.  Since we had the strawberries, we just cut out some of the sugar the recipe called for.  Anyway...just chop up the rhubarb and strawberries, and toss with a bit of lemon juice and sugar.
In a separate bowl you'll make the topping.  Rather than just use panko, as the recipe calls for, we also threw in some oats, along with cinnamon, nutmeg, ground ginger, and some Chinese five spice, since we didn't have allspice on hand.

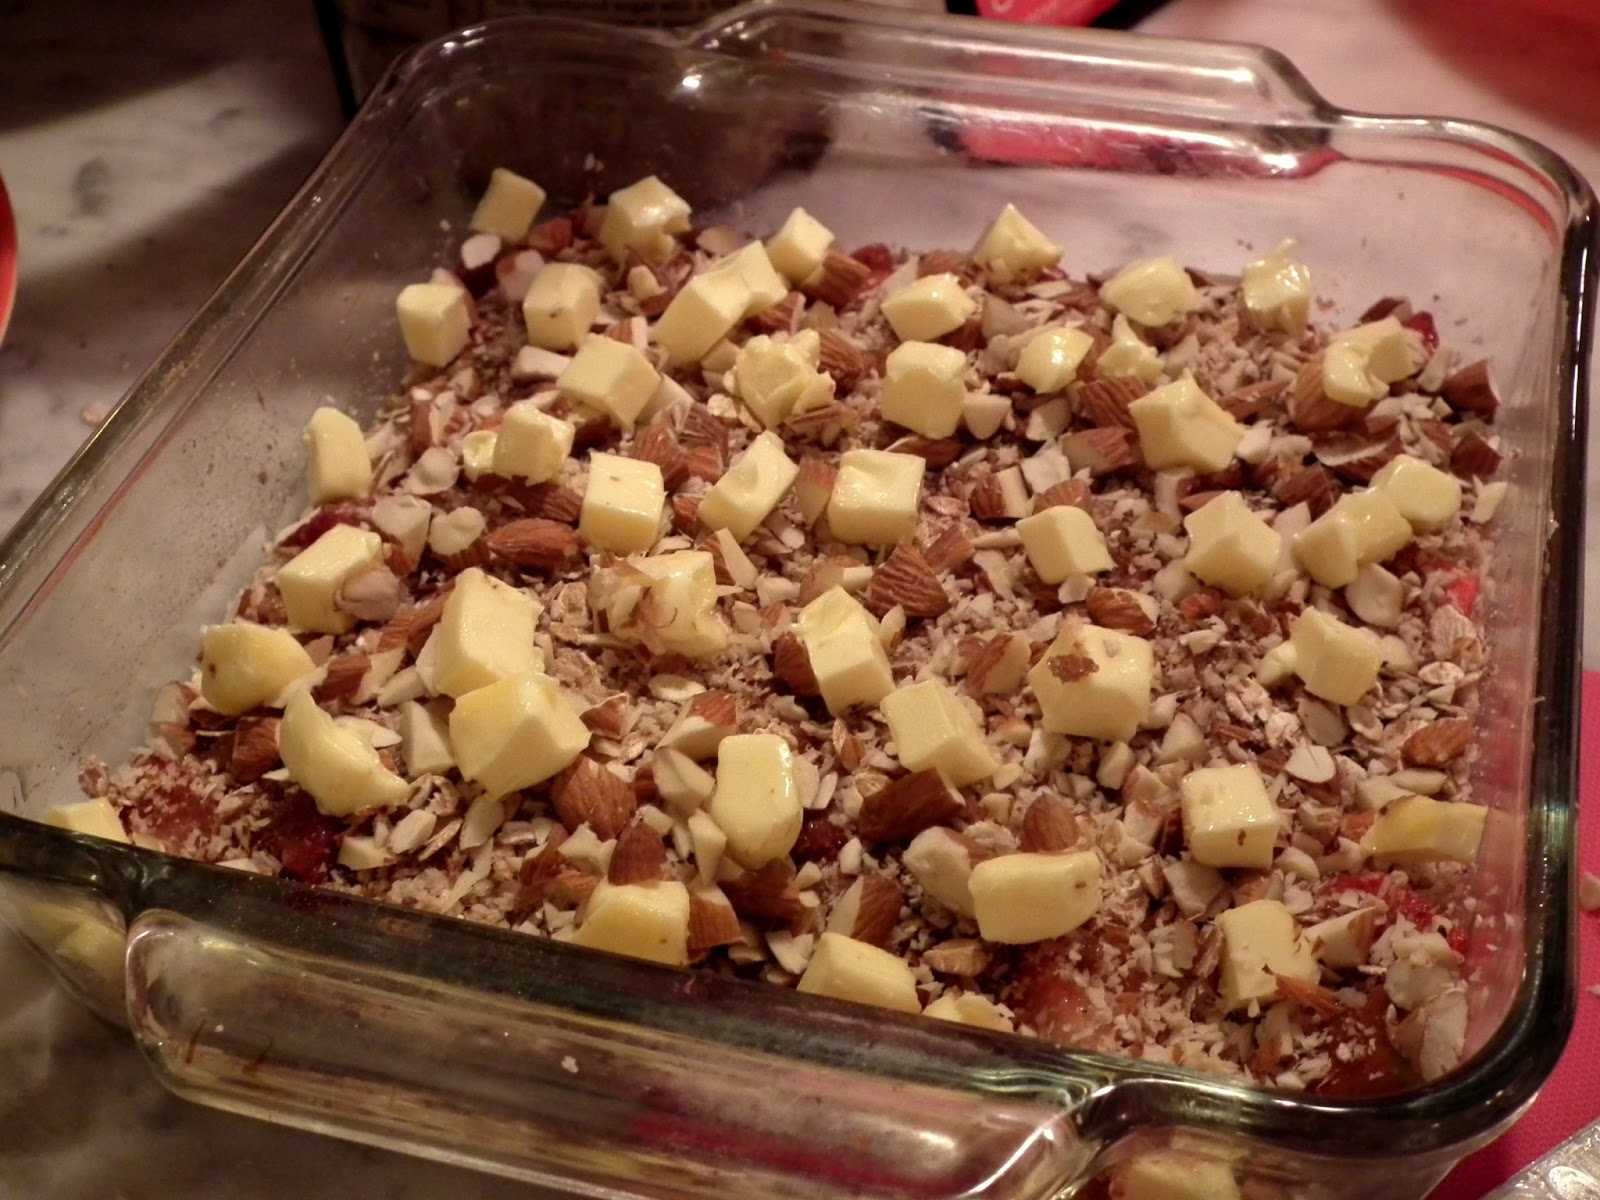
Butter the bottom of your baking dish, and spread some of your topping on the bottom to make a nice little crust.  Then layer on your strawberries and rhubarb so they're evenly distributed.  Top it off with the rest of your topping, along with your chopped almonds.  Then cube up some butter and dot the top.  Make sure the butter is spread out evenly too, so it melts over the whole dish.
Then just pop it into a 350 degree oven for about 20 minutes.  You want the filling to start to bubble, and the top to be golden brown and crisp.  Let it cool for a few minutes, and then dig in! As our friend Jeffrey Zakarian would say, "Yummy!"

May 19, 2013

Coconut Macaroons

It feels like it's been a while since we posted something, so here's a little Sunday treat!  Also, 2 Hungry Hearts now has a Facebook page, so click over and 'Like' the page.

Since starting on our Paleo kick, we haven't really had many desserts (except on our cheat days!) since desserts typically include sugar.  While coming up with our Easter menu, we had planned to make coconut macaroons (though if you read that post, you'll know that we fell asleep...whomp! whomp!).  So, since we didn't make them then, we're making them now!

We had found a recipe online, but Justin didn't really like it...so we made up our own recipe.  So for the first time, you'll actually get a recipe out of us:

2 c. unsweetened, shredded coconut
1/2 c. coconut cream, or coconut milk
1 egg + 4 tbsp liquid egg whites (or just 1 egg + 2 egg whites)
1 1/2 tsp. vanilla extract
a generous squirt of honey
pinch of kosher salt
chocolate (if you want to dip your macaroons in it)

All you have to do is mix all of the ingredients together (minus the chocolate).  Then just spoon the mixture onto a cookie sheet into whatever size macaroons you'd like.
Then pop those babies in a 325 degree oven for about 25 minutes.  They'll get to be a toasty, golden brown color.
The amount of honey you add will determine how sweet your macaroons are.  Ours were on the less sweet side, but I still feel like I'm eating dessert.  And if you want to add some chocolate, now would be the time to  dip your macaroons in some melted chocolate, let it set, and enjoy!

May 13, 2013

Strawberry Shortcake

When it comes to desserts, I'm much more apt to choose a fruit-based dessert over some decadent chocolate delight.  For one, chocolate, especially rich, dark chocolate, makes me sneeze.  And I just prefer a lighter, less sweet dessert.  So what better way to use our quart of strawberries, than to make a strawberry shortcake?

It was perfect timing because Justin received an email from Food & Wine with their 20 top strawberry recipes, which included a shortcake recipe.  It came together pretty quickly, and in no time, we were chowing down on dessert.

Justin took care of the strawberries, slicing them in half, and macerating them with some sugar, orange zest, and grated ginger.  The orange and ginger were our added twists, and added some brightness to our strawberries.
As for the shortcakes, mix the cake flour, baking powder, and salt together.  Using your fingers (or a pastry blender if you have one), mix in the cold butter.  Once the butter is incorporated, add in your cream, and mix with a knife until the dough clumps together.
At this point, the recipe has you pat the dough into a round cake pan, but we decided to make individual little shortcakes.  Once you form them to your desired size, place them on a baking sheet, brush on a bit of cream, and sprinkle a little sugar on top.  Then just pop 'em in the oven at 425 degrees for 20 minutes, or until they're golden brown on top.
While your shortcakes are cooking, you can make your whipped cream.  In a bowl you'll need your cream, some vanilla, and some sugar.  If you want a good arm workout, you can whip it by hand, but we opted for the hand mixer.  In less than 5 minutes, we had some delicious, homemade whipped cream.
Once the shortcakes have cooled a bit, slice them in half horizontally, spoon on some strawberries and whipped cream, and top with your shortcake cap.  We also added a bit or orange zest to garnish.
It was so easy, and so delicious.  It's the perfect summer dessert!  The hardest part was waiting for the shortcakes to cool!

February 11, 2013

Pesto Change-O!

Tonight we thought we'd try something different, and put a twist on your traditional pesto.  I've seen recipes for pestos made with arugula or parsley instead of basil, and walnuts instead of pinenuts, so why not try making a pesto out of all those creasy greens we have?

We pulled all of the leaves from the stems and threw them in the food processor with some garlic, toasted pinenuts, and parmesan cheese.  Once it was pureed, we streamed in some olive oil.  With a bit of roasted garlic salt, pepper, and red pepper flakes, the pesto came together quite nicely.
 
We let all flavors in the pesto mix and mingle together while we put the chicken involtini together.  We started with 2 chicken breasts that we pounded out, then seasoned with salt and pepper.  Inside we put some slices of mozzarella and some sun-dried tomatoes.  Then we rolled up the chicken so everything was tucked away inside, and used some skewers to hold them all together.  The chicken went into the oven to cook for about 20 minutes.
Next, it was time to prepare the turnips.  The last times we got turnips in the share, we made a puree, so we wanted to do something a little different this time.  We found this recipe for roasted turnips with a mustard vinaigrette, and thought we'd give it a shot.  So we chunked up the turnips, tossed them in a little olive oil, salt and pepper, and threw them into the oven (with the chicken) for about 15 minutes, until they were roasty, toasty, golden brown.
The vinaigrette was really simple to whisk together; a little whole grain mustard, a little white wine vinegar, a scallion, some parsley, and a little oil.  Once the turnips had cooled, we tossed them in the vinaigrette, and sprinkled a little fresh parsley on top.
There was a wide variety of flavors on the plate.  There was a nice contrast between the the herb-y pesto, the acidity from the sun-dried tomatoes, the rich mozzarella, and the slight sour tang of the turnips and mustard.

But we didn't stop there!  While we ate dinner, we let our dessert bake.  That's right, folks.  We made dessert!  But don't be fooled...it wasn't a multi-layer cake, or anything fancy like that.  We sliced up the 2 gold rush apples we had, and covered them in pecans, cinnamon, nutmeg, ground ginger and brown sugar.  For the topping, we smashed together some oats, brown sugar, butter, and chopped pecans.  We covered the apples with the oat crumble, and sprinkled a little cinnamon and sugar on top to kind of brulee the top.
By the time we were done eating dinner, the crumble/crisp was just about done.  I don't like my dessert cloyingly sweet, or my fruit pies/crisps/crumbles extra syrup-y, and I want my fruit to still have some bite to them, so this was a perfect dessert.