Showing posts with label tomato. Show all posts

November 6, 2013

You Say Tomato, I Say Yum!

With the colder weather settling in, we've been making a variety of soups lately.  Since we had some heirloom tomatoes from the share, we decided to make a Fall version of our summer tomato soup and grilled cheese picnic.

We started by sweating out some onions and garlic in butter.  We also threw in a sprig of thyme and a bay leaf.  You can just throw the whole sprig in there.  The herbs will fall off the stem as it cooks, and then you can just pull out stem.
While the garlic and onions were cooking down, I quartered the tomatoes.  It doesn't matter how you cut them, though the smaller you the cut them, the faster they'll cook down.  
We added them to the pot, along with about half a can of San Marzano tomatoes, and some tomato paste.  As the fresh tomatoes start to cook down and soften, you can squish them with your spoon or potato masher.
Be sure to season your soup with salt and pepper.  We also added in some dried parsley and Italian seasoning since we didn't have any other fresh herbs on hand.  Let the flavors cook together for at least 10 minutes.  Then we just used our immersion blender to puree the soup and give us a nice, smooth consistency.
Once it was pureed, we let it simmer on the stove while we assembled our grilled cheeses.  We used a combination of manchego and gouda, along with a few slices of soppressata.  To help melt the cheese, cover your pan with a lid to create some steam.
It's a quick and delicious meal for those cool Fall nights.
And don't forget the best part...dunking your grilled cheese in the tomato soup!

October 13, 2013

Shrimply Irresistible!

We keep seeing those Buitoni pasta commercials, advertising an easy date night dinner of shrimp scampi.  The guy rips open the bag of pasta and shrimp and dumps it into a pan, and voila!  "Homemade" date night dinner, lit candles and all.  After much joking about having Buitoni shrimp scampi for dinner, we decided to make our version of date night shrimp pasta.  Shrimp primavera was definitely our inspiration here, despite it being Fall.

The most time consuming part is cleaning the shrimp, and even then, you can just buy shrimp that are already shelled and cleaned.  But if you're like us and buy the shell-on shrimp, you'll need to peel and devein your shrimp.  At the very least, take out the main vein on the back side.    Just run a paring knife down the back, run it under some water, and you're done.  No one wants to eat shrimp poop!

While Justin was cleaning the shrimp, I got to chopping up some onion, garlic, and tomatoes for our sauce.  We had a couple small beefsteak tomatoes and some yellow romas from our share, but you can use whatever you have on hand.  We just let them cook down and release their juices.  If you have grape or cherry tomatoes on hand, as an alternative, throw them on a backing sheet and pop them in the oven to roast.  Once they start to pop, pull them out, and then just smash them with a potato masher for a nice, roasted tomato sauce.

But back to our sauce.  We poured a little white wine, Italian sauvignon blanc to be exact, into the pan to deglaze it, and get all those tasty bits off the bottom of the pan.  Don't forget to cook your pasta while your sauce is cooking.  The shrimp don't take long to cook up, so toss them into your sauce when your pasta is almost al dente.  Since we still wanted some bit to our asparagus, we threw them in with the shrimp.
When your pasta is done, reserve some of the starchy cooking liquid.  Justin wanted to be absolutely sure the pasta was done, so he threw some on the cabinet...it was done!
Once your shrimps are nice and pink, add in a bit of the pasta water and give it a good stir, before tossing in your pasta.
Give it a good toss so all of the pasta is coated in your sauce.  We topped ours with some fresh chopped parsley and basil, and some parmesan cheese.  And to accompany our pasta, we threw together a Fall salad of mixed greens, apple, toasted walnuts, blue cheese, and a cranberry balsamic vinaigrette.
Date night dinners can still be easy without coming from a bag!

October 9, 2013

Hey, Ho! Chorizo!

I know we've been a little quiet over here at 2 Hungry Hearts, but we've been trying to unpack and dig ourselves out from underneath all these moving boxes.  We managed to tackle the kitchen first, and make enough space so that we could start cooking again.  Fortunately the timing worked out pretty well since we're in between CSA share seasons, and have another couple weeks before the Fall CSA starts up.

To christen our new kitchen, we decided to whip up a quick and easy frittata.  Frittatas are a great way to clean out the fridge and use up those little bits of veggies that you have left in your fridge.  We went with a Spanish-inspired frittata, filling ours with chorizo, kale and manchego cheese.  To compliment the frittata, we made some purple potato homefries and a simple salad.

We got the potatoes going first, dicing them up along with some onions and garlic.  You can throw them all in the pan together and let them cook up.  It will take a little while for the potatoes to get crisp on the outside, so you'll want to start these first.  We cooked ours in a little olive oil, and added some salt, pepper, crushed red pepper, and some smoked paprika, which paired quite nicely with the chorizo.
So while your potatoes are cooking, you can get to work on the frittata.  It's best to use a pan that you can also stick in the oven.  We started by browning up our chorizo.
Once that was cooked, we removed the meat from the pan, poured out some of the excess grease, and then tossed in our kale.
While the kale was sauteing, I whipped up about 7 eggs and grated in some manchego cheese.  As soon as the kale was wilted, we added the chorizo back in, and added the egg mixture.  Once the eggs have set in the bottom of the pan, you'll want to pop the whole pan into the oven.  The twist here was that we added some sliced tomatoes on top and let them roast in the oven, along with some extra cheese!
After about 8 minutes, our frittata was cooked through, and we were ready to eat!
The smokiness of the chorizo was balanced out nicely by the acidity of the roasted tomato.  It was a quick and easy meal that would also make an excellent brunch item.

September 1, 2013

Chow Mein Chow Down!

Every Sunday growing up, we'd have a light breakfast, and my mom would make a giant platter of noodles for lunch.  You'd think she were serving an army, but it was usually just the 3 of us; mom, dad & me.  She'd rotate between chicken chow mein, Singapore style noodles (my and Justin's favorite), and tomato beef chow mein.  In an effort to continue the tradition, we whipped up some tomato beef chow mein, albeit for dinner rather than lunch, on a recent rainy Sunday.

Start by slicing your flank steak into bite size pieces.  Season it with some white pepper, and make a marinade of soy sauce, sesame oil, and Chinese five spice.  You'll also want to toss in some cornstarch; just enough to coat the meat.  This will help give the meat a nice crust when you cook it, and help thicken the sauce.

While your meat is marinating, you can get to work on your sauce.  Start by slicing up some onion and bell pepper.  It's up to you how you want to slice 'em.  Mom always cut them into chunks, which makes it easier to pick up with chopsticks, but it's totally up to you.  Toss them into your wok with some oil so they start to cook and soften.  You'll also want to slice up some celery.  I like my celery to still have some bite to it, so I add these in towards the end.

Once your peppers and onions have softened, add in your tomatoes.  We happened to have some fresh tomatoes on hand that needed to be used, so we diced those up and added them to the wok.  It wasn't quite enough, so we also added in about half a large can of tomatoes.  As they start to cook down you can just use a wooden spoon to break them up into more manageable chunks.  You'll also want to add in curry powder.

Once the tomatoes start to break down, add in your meat.  I just dump the whole bowl in, including any extra cornstarch that's in there.  Again, this will help thicken your sauce so you have a thicker, gravy-like consistency.  Just before the meat is cooked through, I add in the celery.

While all this is going on, you should boil some water for your noodles.  You'll first want to cook them in the boiling water, like you would pasta, but pull them out while they're still slightly underdone.  Transfer them to a baking sheet that you've sprayed with cooking spray, and pop them in the oven so they can crisp up.  Once they're golden brown, flip the noodles, and pop 'em back in the oven so the other side can get crisp.  The easiest way to flip your noodles is to place another baking sheet on top of the pan with the noodles, and flip 'em over.
Once the noodles are done, pull 'em out of the oven, and you're ready to serve!  If you're serving it up family style, place your noodles on a platter and top with your sauce.  The warm sauce will help soften your crisp noodles, and make it easier to break them apart and eat.  Since it was just Justin and I, we put noodles in each of our bowls, and spooned on the sauce.
It was a great, comfort meal on a rainy day.  Almost as good as mom's!

July 18, 2013

Outdoor Flicks & Picnics!

As you may have seen on Facebook last night, we had a delicious summer picnic spread that we enjoyed while taking in an outdoor movie (if you didn't see it, you should "Like" our Facebook page!).  One of the things I love about summer in DC is that on any night of the week, you can see an outdoor movie.  Most neighborhoods are jumping on the wagon, and you're sure to find at least 1 movie each week that you want to see.  As foodies, we had to go above and beyond a bucket of fast food chicken or prepared food from the grocery store.  We prepared an awesome spread for movie without going overboard like this:
One of the things I'm not a huge fan of when it comes to summer in DC, is the sweltering, humid weather.  As soon as I step outside, I feel sweaty and gross, and the last thing I want to do is stand over a stove, or in front of a hot oven.  The perfect solution is a cold soup!  And since we picked up a ton of tomatoes in this week's share, gazpacho was the natural choice.

For a little guidance, we found this 
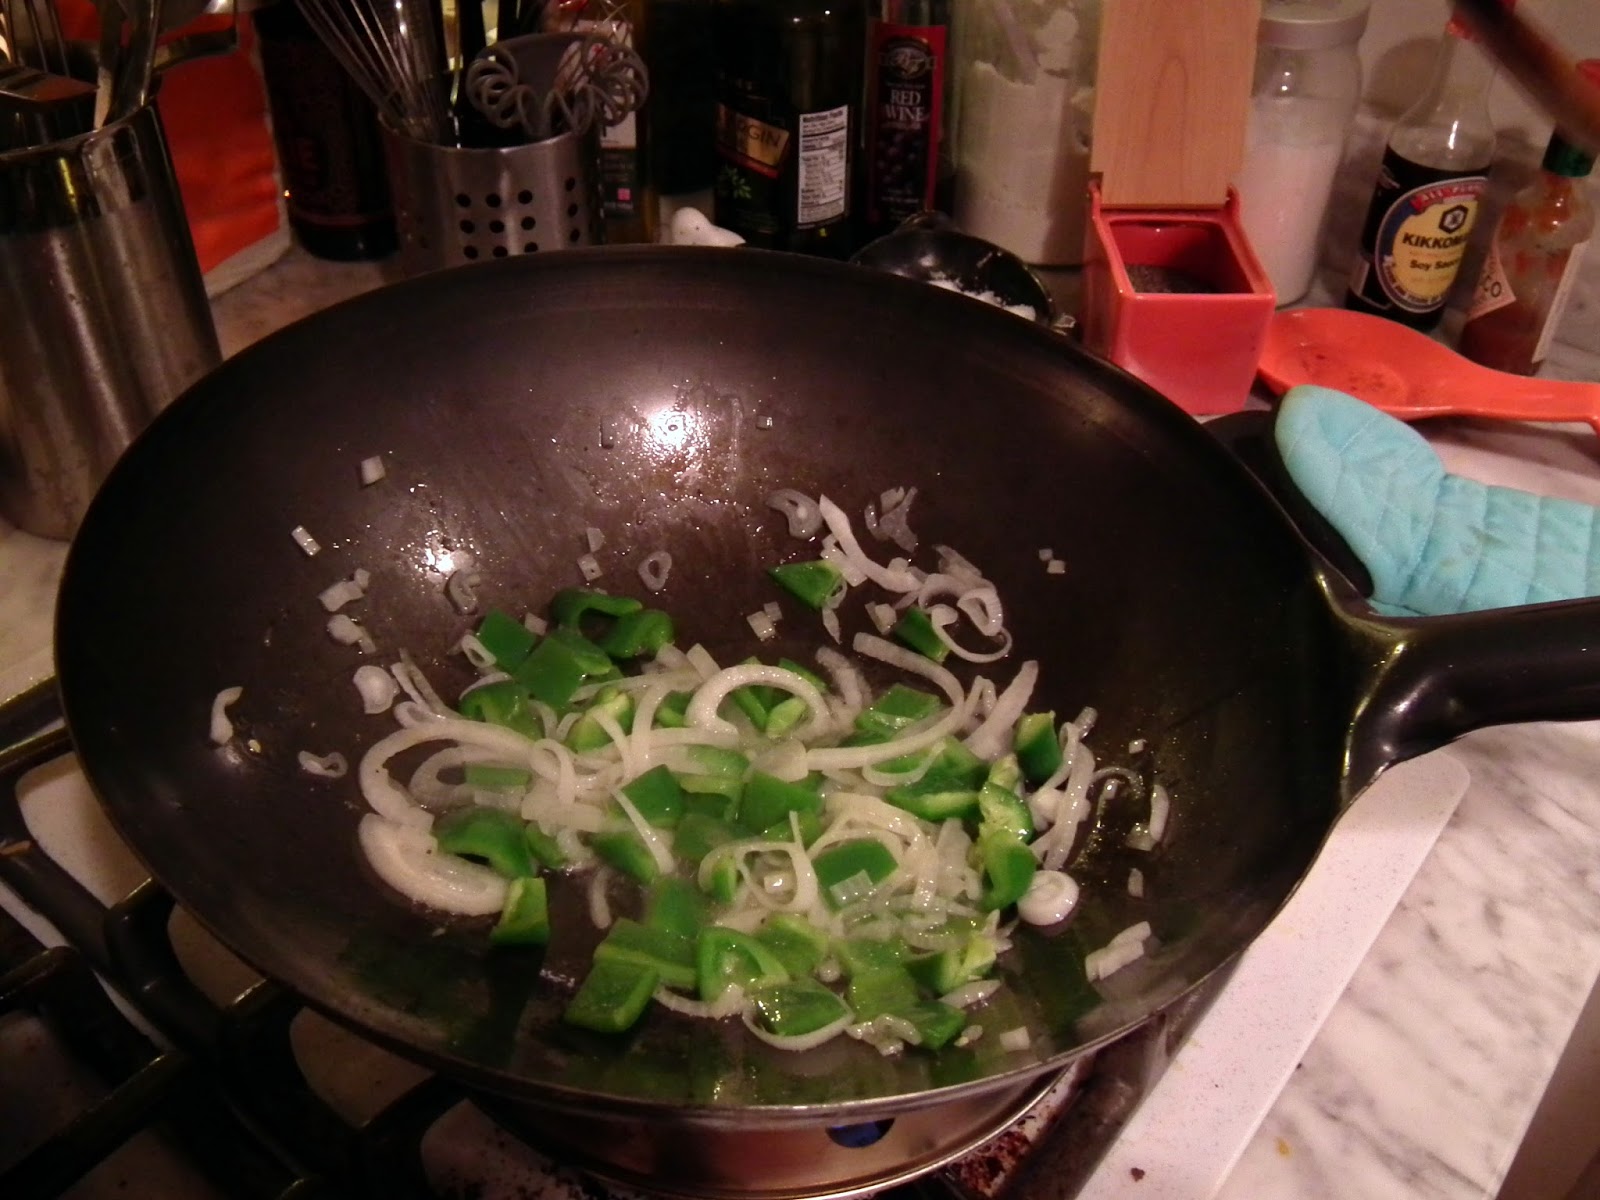
recipe.  As always, we put our own spin on it.  But to get you started, gather all your veggies, a good knife, a big bowl, and get to chopping!  Make sure you collect all the seeds and juices that may leach out from your veggies as you're cutting them.  That will help thin out your soup.  I left the skins on all of the veggies, except for the cucumber.  He was the only guy that got peeled.  Because we're both huge fans of garlic, we added about 5 cloves.  And since we had a jalapeno on hand, we chopped that up, as opposed to using hot sauce, as the recipe called for.


Once you're done chopping, you'll have this beautiful bowl of fresh summer veggies!  The recipe instructs you to just get your hands dirty, and squish all the veggies together, but I don't think that's an ideal method, considering the peppers and onion aren't as soft as the tomatoes.  Plus, we wanted more of a soup consistency, as opposed to a chunky salsa consistency.  So I pulled out the immersion blender and got to work.  It didn't take long to break down all the veggies either.

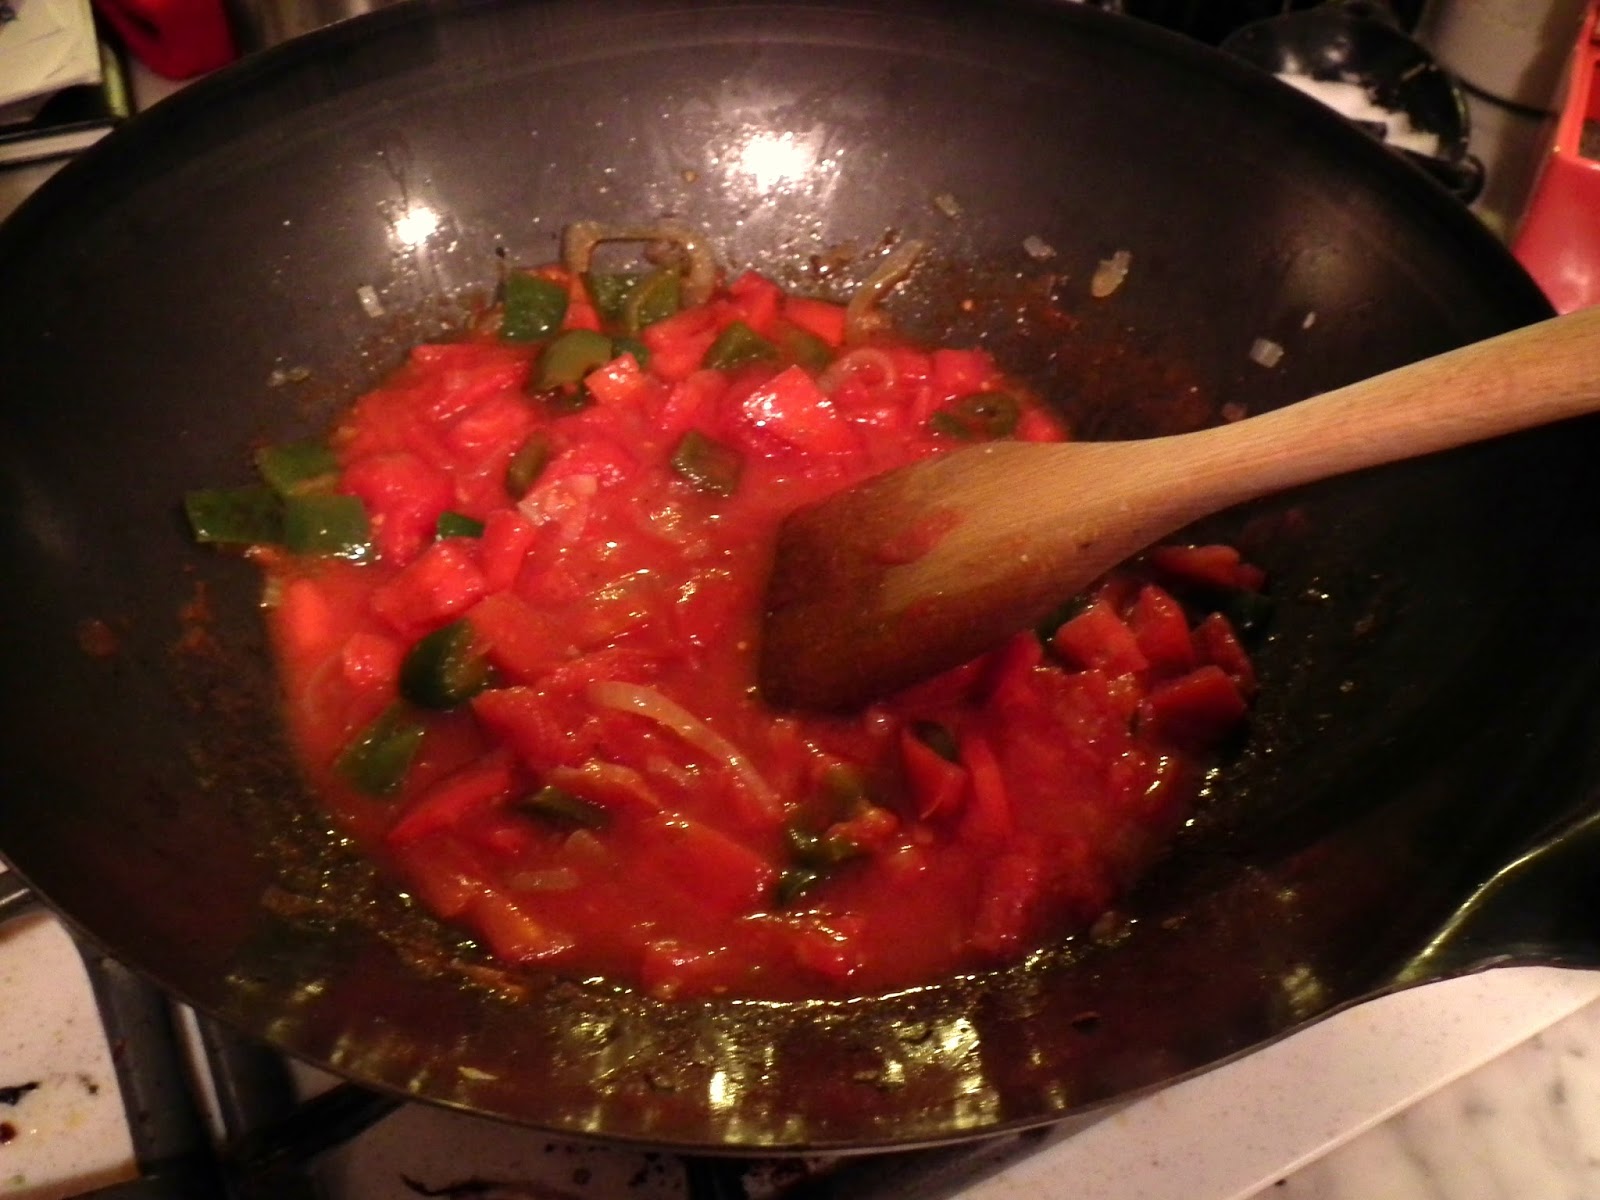
Here's where you really need to taste and add seasonings, as needed.  I started with salt, pepper, and juice of half the lemon.  I started out conservative on the lemon but ended up using the whole thing.  Give it another whirl with the blender, and taste again.  If it's not spicy enough, add another jalapeno, or a splash of hot sauce.  I also threw in the balsamic and red wine vinegars, olive oil, and a splash of worcestershire sauce to balance out the sweetness of the tomatoes.


To top it all off, we threw in a bunch of fresh cilantro and parsley.  Again, blend it all up and taste it to make sure the flavor is right where you want it.  Then just pop it in the fridge to chill until you're ready to eat.


No tomato soup would be complete without a grilled cheese sandwich to go with it.  But we couldn't just go with any ol' grilled cheese.  We had to step up our game for all of you! So we chose a nice baguette for our bread, some prosciutto, humboldt fog cheese, and some arugula.

As with any other sandwich, just start building.  I failed to put cheese on both sides of the bread initially, and they wouldn't stick together, so it's in your best interest to do this right off the bat.  The humboldt fog is a mold-ripened goat cheese, but it has a little less tang and a little more smokiness than a typical goat cheese.  It's somewhat soft and crumbly, but it was easy enough to spread on the bread, and melted into the meat and arugula.  With your sandwiches assembled, melt some butter in a pan, and get to toasting!
If you're packing these treats up for a picnic, let the sandwiches cool down a bit before wrapping them in foil, or putting them in a plastic container.  You don't want them to sweat and get all soggy.

All that was left was to pop some popcorn (truffle parmesan popcorn, that is!), throw a couple beers in the cooler, and a couple peaches for dessert!

June 30, 2013

Part II: Bagels

Now that we have our gravlax, we need the perfect vessel to deliver it to our mouths.  And what better vessel than a nice, chewy bagel?  One thing that DC is desperately lacking is a good bagel shop, so we thought we'd try our hand at making our own.  Bagels have a reputation as being challenging to make, but they aren't too tough--they just require some planning and patience.  The dough needs to rest overnight, so you need to mix it the night or two before you want to enjoy them.  My mom recommended this recipe, which was easy to follow.

Start by mixing your quick acting yeast, water, salt and honey in a bowl.  Add that to your bowl of bread flour, and start mixing.  Our dough came together in a matter of minutes.  Let it rest for about 5 minutes, and then give it another spin in the mixer for 3 minutes.
Lightly flour your surface, and knead the dough for about 3 minutes.  Then just place your dough in a lightly oiled bowl, cover tightly with plastic wrap, and let it rise for an hour.
Then it's time to shape your bagels.  Break of 6-8 balls of dough, or in our case, 5 balls.  Rolls them into balls, and then poke a hole in the middle.  Shape it into a bagel shape, and then place on a baking sheet that's covered with some lightly oiled parchment paper.  Once you have your bagels shaped, cover them with plastic wrap and stick them in the refrigerator overnight.
You'll need to pull your bagels out of the refrigerator at least an hour before you're ready to cook them.  So we pulled them out of the fridge and then went for a run!  Get your poaching liquid ready on the stove by boiling a pot of water that's at least 4 inches deep.  Once it starts to boil, reduce the heat, and stir in your salt, baking soda and honey.  You'll notice it starts to smell like delicious bagels!  While the water is coming up to a boil, you can test your bagels.  In a bowl of cold water, drop in one of your bagels.  If it floats to the top, you're ready to go.

Once your poaching liquid is ready, carefully drop in as many bagels as will fit in your pot without overcrowding it.  They should float right on top of the liquid.  After 1 minute, flip the bagels, and let them poach for another 30 seconds.  Then pull them out of the liquid with a slotted spoon, and place back on the oiled parchment paper, domed side up.  Continue poaching until all your bagels have touched the liquid.


Now it's time to add your toppings!  If you want to use dried onion or garlic, be sure to rehydrate them so they don't burn in the oven.  We made 2 roasted garlic salt and onion bagels, 2 poppy and sesame seed bagels, and 1 everything bagel.

Then just pop them into a 450 degree oven for about 8 minutes.  Then rotate your pan, and cook for another 8 minutes, or until they are golden brown.  Place them on a cooling rack for about 30 minutes before you cut into them.  This is probably the hardest part...waiting.

And now...how to build the perfect bagel.  This comes from years of practice!  Start with your cream cheese.  We both like whipped cream cheese because it's so light and fluffy.  Then put your capers on.  They add a nice brininess, and since they're right on top of the cream cheese, they won't roll away.
Then add your red onion and tomatoes.  I like to slice the tomatoes in half-moon shapes so they fit onto the bagel a little better.
Then top with your gravlax or smoked salmon.  This way, everything should stay on top of your bagel when you bite into it, and you get a bit of everything in every bite.
Now for the most important step--take a big delicious bite into chewy, salty, rich, pillowy deliciousness!