Showing posts with label stock. Show all posts

January 5, 2014

Everybody Loves Ramen!

We've had some cold weather around these parts, and a freezer full of turkey meat and turkey stock. So to kill two birds with one stone and use up our turkey, and warm our bellies, we decided to try our hand at making our own ramen.  We transformed this American fall classic into a Japanese-influenced cold weather delight.

To our basic stock, we added some mirin, garlic, soy sauce, and some white pepper.  Since our stock was pretty thick, we also added some water to give it the right consistency.  Let it simmer and reduce to about half.  We also threw in some of the shredded turkey we had on hand.
Once your broth has reduced, throw in your noodles.
Once they started to soften, we added in our chopped baby bok choy and some sliced scallions.  We wanted to keep some crunch to the bok choy, so we added them at the end.  If you want them to soften more, you can add them earlier.
Once the noodles are al dente, you're ready to serve!  We topped our ramen with some strips of nori for some added umami punch.
It was a nice and hearty bowl of soup, perfect for a cold winter's day!  It was a great change of pace from other turkey leftovers, and the flavor was comparable to the real thing.  Look for us to try a more traditional tonkotsu ramen in the future.

December 10, 2013

It's Pie Style Jack II: The Em"pie"re Strikes Back!

If you're like us, you've probably spent the week after Thanksgiving eating nothing but leftover turkey and side dishes.  In an effort to not just recreate our Thanksgiving dinner plates, we got creative and turned our leftovers into turkey pot pies!

We started by quartering a few potatoes and peeling a few leftover carrots, and popping them into the oven to roast them for about 15 minutes.  Since they typically have a longer cook time, roasting them first helps minimize the time your pot pies need to be in the oven.  Plus, it gives them a nice roasty flavor.
While those are roasting, you can make your dough to top your pies.  We kept it simple by combining 1 cup of flour with 1 cup of chilled butter, and a splash of vodka.  Try not to overmix the dough, as you want the butter to stay as cold as possible.  Once our dough came together, we wrapped it in some plastic wrap, and stuck it in the freezer to get it cold again.  This will help give you a nice, flaky crust.  If you're making your dough in advance, you can just keep your dough in the fridge.
Once the dough was chilling, we started building our pies.  We chopped up some fresh onion, and dropped them into our little bowls.  Then, each bowl got a healthy spoonful of our leftover green bean casserole.
Then we chopped up some turkey meat, and added those to each bowl.  At this point, the potatoes and carrots were also done, so we chopped those into smaller pieces and tossed them in the bowls as well.
The one thing that was missing was a bit of a gravy.  So we added in a few spoonfuls of our turkey stock, as well as a splash of milk.  Then give everything a little toss and turn in the bowl so it's all mixed up and coated in the stock and milk.

Then, just role out your dough, cut it into circles wide enough to top your bowls.  Make sure you cut slits in the top to so the steam can escape (clearly the 2 on the right were our first crusts).  You also want to beat an egg and brush each crust with the egg wash.  This will give you a nice, golden brown crust.
Be sure to place your pies on a baking sheet to catch any gravy that may spill out of your pies.  Pop them into a 350 degree oven for about 15 minutes, or until your crusts are cooked through, and golden brown.
The crust was buttery and really flaky, almost like a biscuit.  It was the perfect topper for our pot pies, and a great way to repurpose our leftovers.

December 8, 2013

I. Wanna Stock and Roll All Night!

We're all about using as much of an animal as possible when we cook, and not letting anything go to waste.  So once we sliced as much turkey off the bone as we could, we threw the carcass into a stockpot with some water to make a delicious stock.  Just like we did with the pig head last Christmas, the turkey bones sat on the stove for a good 4 hours.

It's really easy, and you can do this with any bones, whether you've got a chicken, shrimp/lobster shells, fish bones...you can make a pretty mean stock out of just about anything.  Since we knew we'd mostly be using the stock for soups, we also threw in some celery stalks, carrots, and a bundle of sage, thyme and rosemary.  If you want a more plain stock, you can leave those items out.  Then just fill your pot with enough water to cover the bones.
Let it simmer away for 3-4 hours.  Any meat that was left on the bones will fall right off, and you'll be left with a rich, delicious stock.
You'll want to first pull out as much meat as you can.  I first tried using a slotted spoon, to separate the meat from the liquid, but that was taking too long.  I then changed up my method, and just poured the contents of a pot through a strainer.  The liquid went into a plastic container, and the meat was in the strainer.  That allowed me to just pick out the celery and any small bones that had separated from the carcass.  

Once you've separated out the big chunks of meat, towards the bottom of the pot, we switched to using a finer mesh strainer.
We were left with several containers of stock, and bowl of shredded turkey.
Since we knew we wouldn't be making soup right away, we put the turkey into a plastic bag, and put him in the freezer for safe keeping.  We kept one small container of stock in the refrigerator, but the rest went into the freezer as well.  So now we have the makings of a delicious soup!

February 17, 2013

Insert Clever Title Here

I know, I know...the title is a little disappointing...but you can't win 'em all.

When it comes to ground meat, I think you're a little limited in what you can do...burgers...pasta with meat sauce...meatballs...but we didn't want to do any of that.  So we turned to the interwebs to find an alternative, and we came across a recipe for fennel stuffed with sausage and parmesan.  It sounded the like the perfect way to use the pork sausage we'd picked up in the share, and it came together quite easily.

We started with a couple fennel bulbs, chopped off the stalks (though we reserved the fronds), and threw them in a pot to steam and soften.
While those were steaming, we got to work on the sausage.  We browned it with a little garlic, shallot, red pepper flake, and some oregano.  Or maybe there was a lot of oregano...Justin unscrewed the top of the spice jar, not realizing there wasn't a shaker top, and dumped about half the jar in the pan.  We were able to scoop out a good portion of it without sacrificing any sausage.  Luckily the other flavors helped to subdue the oregano.
Once the sausage was browned and cooked through, we started to add the parmesan and pecorino cheeses.  We also threw in some panko.  As everything cooked in the pan, the sausage developed a really crispy texture, as if it had been fried.

Once the fennel was soft, we cut them in half and cut out the core, so we could fill in the layers with the sausage and cheese mixture.  We made sure to get between all the layers of the fennel.  These went into a baking dish with a bit of stock, covered the dish with foil, and slid it into the oven for about 15 minutes.
Then we uncovered them, and let them cook a bit longer.  We finished them off with some of the fennel fronds and a little more cheese.  They were delicious, and well balanced.  The salty, savory sausage and fresh fennel fronds really rounded out the dish.

We know what you're thinking, these plates looks a little sparse.  Well, that's because we had a super rich, sweet, and creamy, dessert that we made for the evening.  We had some egg yolks left over from an omelette, so we decided to make some creme brulee.  Creme brulee may sound intimidating but it's really easy.  First scrape out a vanilla bean add it to a boiling sauce pan of cream.  Then just mix together eggs and sugar and slowly temper in the mixture vanilla and cream.
Once the cream, eggs and sugar were combined, we poured them into little ramekins, and the ramekins went into a hot water bath to cook.  This helps prevent them from drying out.
Once they were cooked, we let them set in the fridge overnight.  To get the nice, crunchy top, we added a bit of sugar to the top.  I was a little skeptical about Justin with a blowtorch so we just finished them off in the broiler.
We were a little distracted eating our sausage stuffed fennel, and the sugar got a tad bit burned, but they were tasty nonetheless.

December 26, 2012

Face Off!

What better to way to spend Christmas morning than by defacing a pig, literally?!?! 

Justin was welcomed into the family by receiving a pig head for Christmas.  I guess its a replacement for a lump of coal ;) 
So after opening presents on Christmas morning, we set off to make porchetta di testa!

First, we needed to grind up our spices that would later be wrapped in the face.  With Justin's new morter & pestle, we ground up black peppercorns, coriander, star anise, bay leaves, red pepper flakes, and some juniper berries.
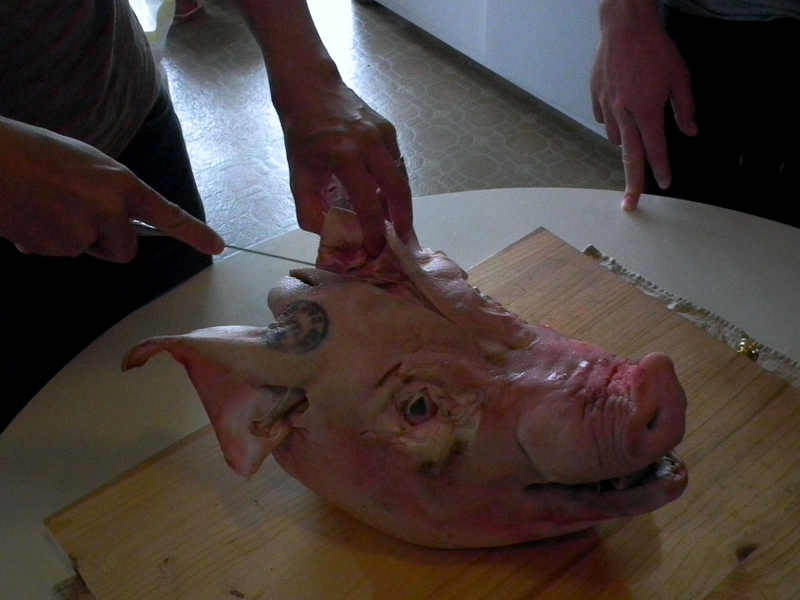
Next came Mr. Pig!
I gave him a quick shave to get rid of some of the longer facial hair.  He had a lot on his ears too.
Once he was clean shaven, and looking handsome, it was time to cut the face off.  I took the first stab at it (get it...stab...).  My cousin, Lauren, who'd taken a pig butchering class and learned how to make this, coached us along.  Using short strokes with the knife, and pulling the skin away, we just followed along the skull to release the face.  We were careful not to puncture the eyeball, and tried to keep everything in tact as best we could.
It was a little tough to navigate around the socket by his temple, but I managed to get the left side of his face off in one piece.  Next, it was Justin's turn to cut off the right side and the snout.


Then we were left with the pig face, in two pieces.  Since Justin cut the snout off, I had the pleasure of cutting out the tongue.
The next step in the preperation was to remove all the glands, lymph nodes, and other untasty bits.  We took off a fair amount of fat in the process, but there was plenty of meat left.  Before laying out the face to season it, we cut off one of the cheeks to make guanciale (more on that in a minute).  We tucked the ears through the eye sockets to fill the holes, and layed out the face.  It took a lot of flipping and turning of the face pieces to figure out the best way to layer the two sides so we could roll it into a fairly even log.  Once the pieces were in place, we massaged in our seasonings with Kosher salt, getting into all the little nooks.

With the leftover salt and seasonings, we packed it on top of the cheek we cut out, and placed it in a ziploc bag where it will sit in the fridge for a week.  When we get home we'll hang it up to finish curing, so we'll post an update when that's ready to eat.

Now, back to the pig face.  While removing the face was time consuming, it was quite a fun experience, while tressing it proved to be more difficult.  Essentially, we rolled our seasoned porchetta like a pork loin, but the uneven shape made it a bit of a challenge. It took me a while to get the hang of looping it around, but it turned out alright.

The porchetta is sitting in the fridge until tomorrow, when we'll roast it.  Once its ready for eating, we'll slice it thin, and treat it like charcuterie.  We'll let you know how it turns out!

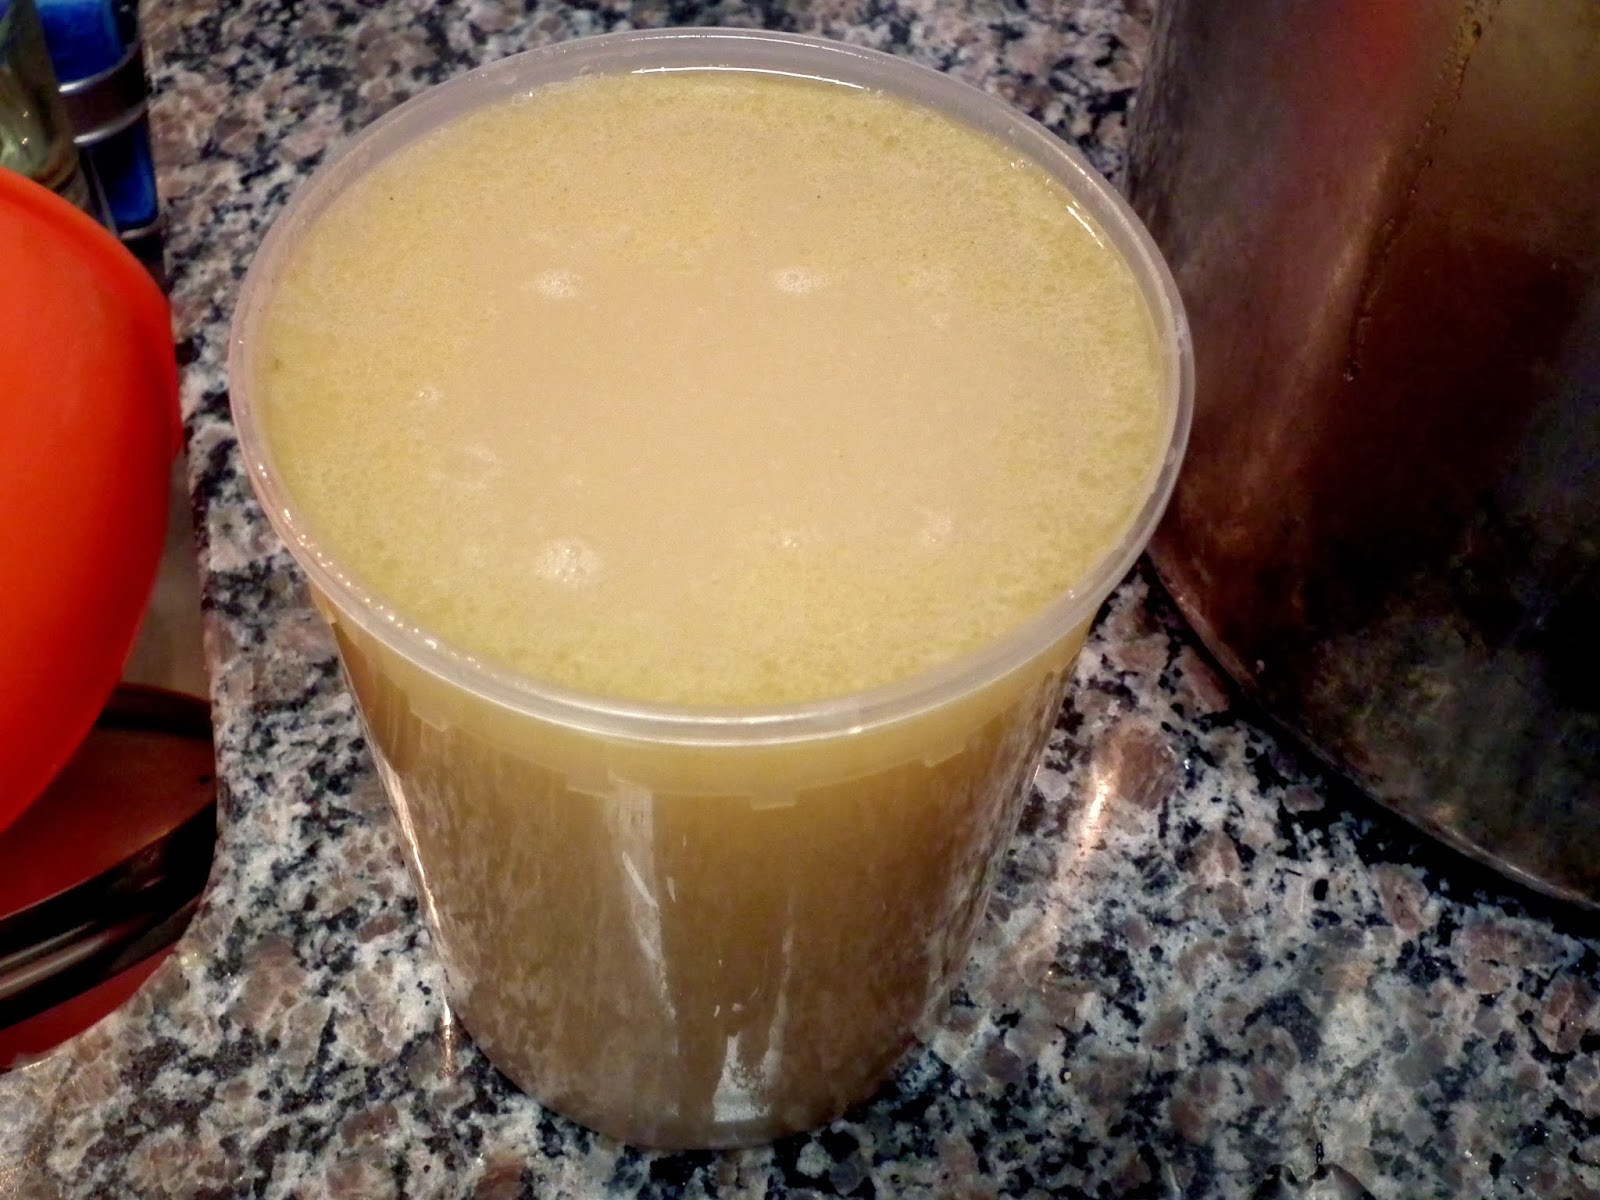
And, so we don't waste any bit of the head, we're roasting it (eyeballs and all), to make pork stock.  It should make for some tasty dishes down the road.