Showing posts with label Zakary Pelaccio. Show all posts

September 4, 2013

It's Not A Tumer[ic]

When we got a whole cornish hen in our recent share, we wanted to do something more with it than just roasting it in the oven, or making beer can chicken again.  We turned to Eat With Your Hands for some inspiration, and found a recipe for tumeric chicken and celery mostarda, and we just had to try it out.

We started off by rinsing our hen.  After we were done making her dance around and flap her wings, we patted her dry and set her aside while we prepared her butter rub.
For the butter spice rub, we combined a jalepeno, turmeric, a couple cloves of garlic, kosher salt, and some fenugreek (our own tweak to the recipe), and smashed it into a paste with my mortar & pestle.  It takes a little elbow grease, but your'll end up with a nice paste.
Add your paste to some softened butter until it's well combined.  Then you're ready to massage it into your bird.  Make sure you get in all the nooks and crannies, as well as under the skin.  You should be able to separate the skin from the meat just enough to slide some of your spiced butter in there.
You're supposed to let your chicken marinate overnight, but we didn't read the recipe in advance.  So don't fret.  It still turns out tasty and delicious!  Now with your lemongrass, give the stalks a few good whacks with your knife.  This will let the lemongrass essence come out when it's in the oven.  Place the stalks in the bottom of your pan, and place your bird on top of them.  This prevents the bottom of your bird from cooking too fast, and imparts some nice flavor.
Pop her in the oven for about 20 minutes, then add some coconut milk and a bit of lime juice to your pan, and put her back in the oven.  You'll want to baste her periodically for the last 20 minutes as well.
While your bird is roasting, you can start on your celery mostarda.  Mostarda is a traditional Italian condiment of candied fruits made with mustard oil.  But Pelaccio puts an Asian spin on it by adding some heat, and fish sauce to the mix.  Start by slicing your celery into pieces, and toss with some salt.
In a separate bowl, combine a couple dried chilies, fish sauce, honey, star anise, cloves and some water.  Make sure you toast your chilies prior to adding them to your liquid, and be careful not to inhale over the toasted chilies.  We made the mistake, despite the warnings in the cookbook.  Let's just say, it's not pleasant.
Melt some butter in a small saucepan, and add your celery.  After about a minute, add your liquid mixture, and let it cook until the celery is tender.
Pull your cooked celery out of the pot, and let your pickling liquid continue to reduce until it is the consistency of maple syrup.  We didn't have any mustard oil on hand, so we had to improvise a bit.  We toasted up some mustard seeds, and then ground them in the mortar & pestle with a bit of sesame oil.  Once your liquid has thickened, whisk in your mustard oil, and then pour it over the celery.  You'll want to be sure to remove the chilies, star anise and cloves first.  You can also can your mostarda, like you would pickles.  If you do that, you can keep the aromatics in the liquid.  But since we were going to eat ours right away, we made sure to remove them, so we didn't accidentally bite into a clove or star anise pod, and ruin our pallets.
By the time your celery is done, your chicken should be done too.  Pull her out of the oven, and make sure to let her rest before you carve her up.
Our cornish hen was super moist, and had a very subtle coconutty flavor that mellowed out the spice rub.  It came out pretty tender with crisp skin and cooking it on the lemongrass imparted a citrusy taste without an acidic bite.  As good as the meat was, the real hero was the celery mostarda.  Taking cues from Malaysian cuisine, it had spicy, sweet, and sour flavors that awaken your taste buds.  The celery was a perfect blank canvas for all that flavor, and the texture was really nice as well.

August 24, 2013

Get In My [Pork] Belly!

Despite having shelves of cookbooks and cooking magazines, we rarely take the time to flip through them and try out a recipe.  But last night, we did just that.  This summer we've gotten a watermelon in every share and we were running out of ideas (watermelon is to summer as cabbage is to winter in the CSA world).  Justin had actually already spent an afternoon thumbing through Eat With Your Hands, flagging the recipes that piqued his interest, including a crispy pork belly and watermelon salad.  It's not the first combination that comes to mind when I think of watermelon or pork belly, but let me tell ya...it's ridiculously good.

You'll want to start by pickling your rinds since they need to sit in the pickling juice for at least an hour.  You can also do this up to 2 days in advance. Start by mixing your liquid:
2 c. rice vinegar (we only have about 1.5 c. rice vinegar, so we used white vinegar for the remainder)
3 shallots, thinly sliced (we only used 2, since ours were pretty big)
2 Thai bird chilies, thinly sliced (we used jalepenos instead)
2 fresh Kaffir lime leaves (we found ours at Whole Foods, but Asian markets have them too)
2 inches ginger, peeled and sliced
1.25 oz palm sugar or 1 round gula jawa or 2 tbsp light brown sugar
1 tbsp koser salt
Combine everything in a saucepan and bring it to a boil.  All the flavors of the lime leaves, ginger, shallots and peppers will steep into the vinegar and sugar as it cooks.  The sugar adds a much needed sweetness to help cut the tanginess of the vinegar.  While your liquid is warming up, you can start slicing your rind.  You'll want to cut the flesh of the watermelon away from the rind, and also remove the tougher, dark green skin, so that all your left with is the fleshy white part.  You'll cut the rinds into cubes, and once your pickling liquid has come to a boil, and the sugar has dissolved, strain the liquid over your rinds.  They can go into the fridge while you prepare everything else.  You'll also want to cut the flesh of the watermelon into cubes, which can also go into the fridge to stay chilled until you're ready to serve it.

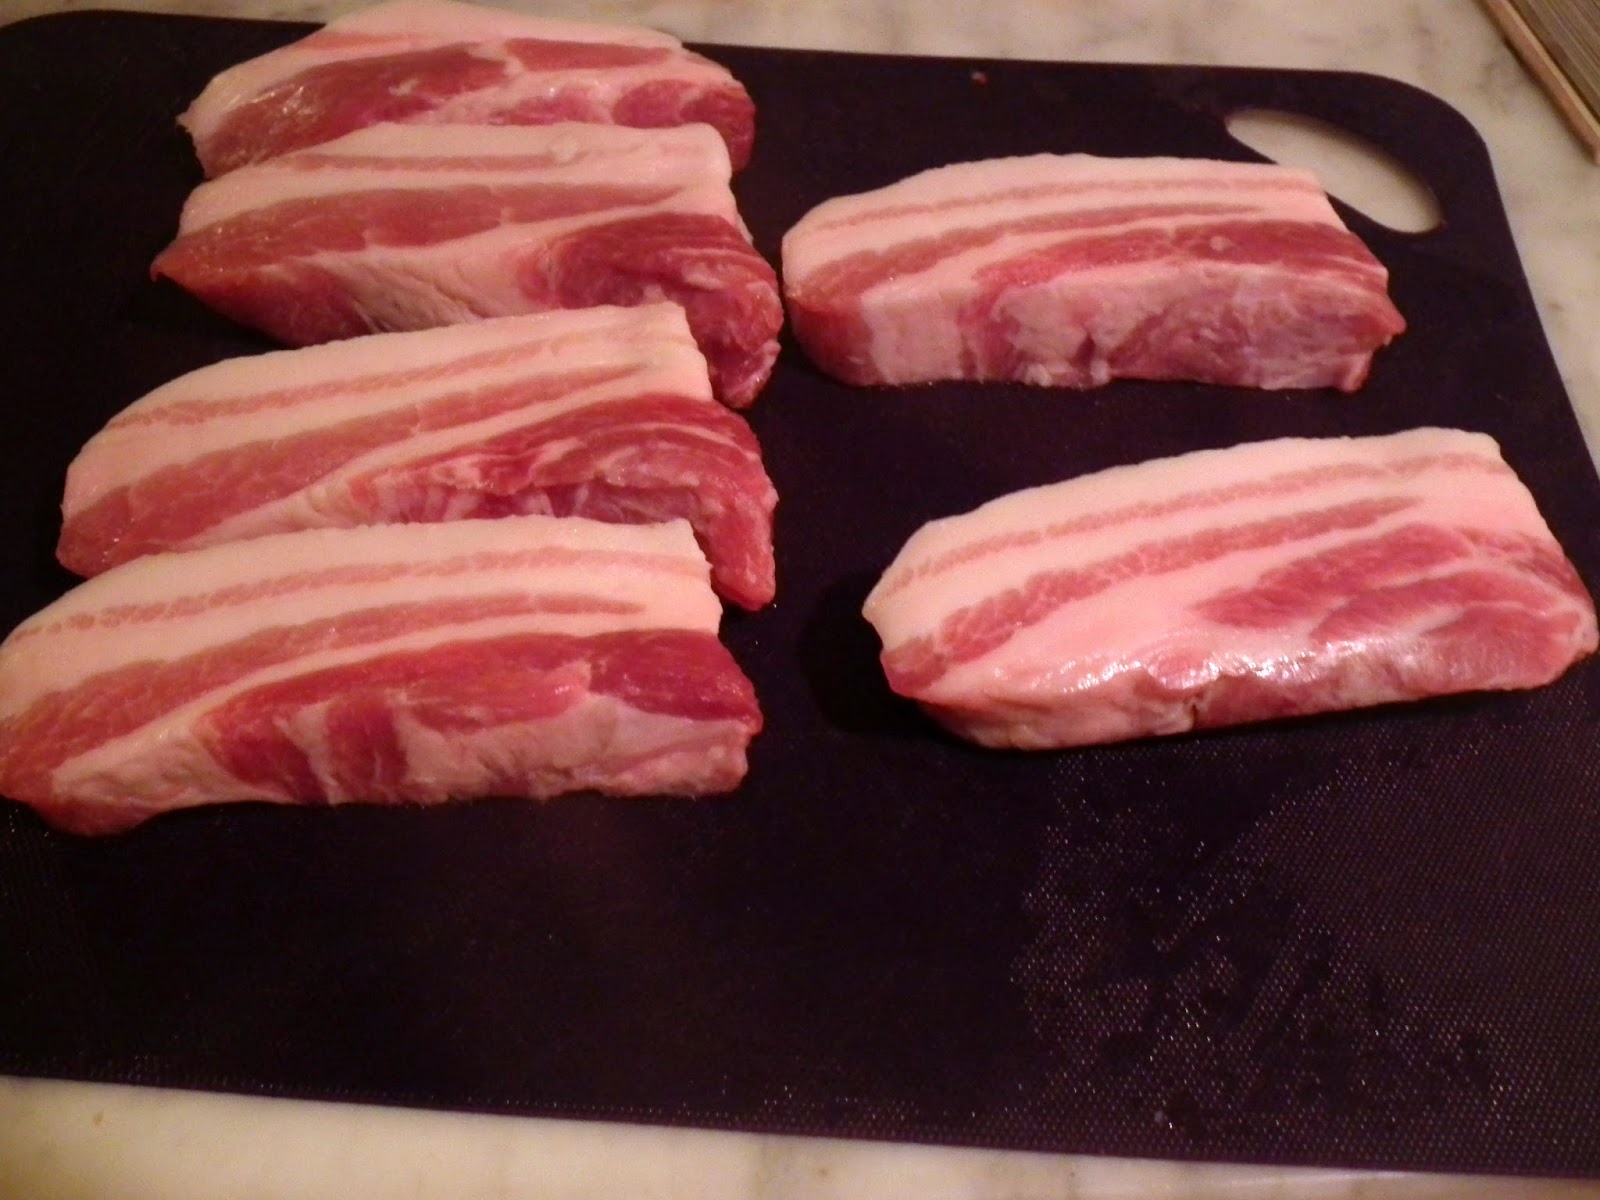
Now for the pork belly.  The recipe tells you to fry your pork, but we decided to just render out the fat and braise it in my dutch oven.  Just cut it into 1-inch chunks, and drop 'em in the dutch oven.  We had about 1 1/3 pounds of pork belly, and it took 20-25 minutes for it all to render down and crisp up.
While your pork is cooking, you can make the dressing for your salad.  In a food processor, combine:
3 oz. palm sugar or 2 rounds gula jawa or 1/4 c. light brown sugar
1 c. rice vinegar (we used Chinese cooking wine since we were out of rice vinegar)
1/2 c. fresh lime juice
4 inches fresh ginger, peeled and sliced
24 cilantro stems (use both the leaves and stems)
2 garlic cloves
3/4 tsp Kosher salt

Mix equal parts watermelon and pickled rinds, along with 2 sliced scallions, and freshly torn mint and Thai basil leaves (we used lemon basil instead).  Pour enough dressing over the salad so it lightly coats everything.  When your pork is done, divide it amongst your plates, and top each with the watermelon salad.  Garnish with some sesame seeds, and in our case, some crumbled chicharrones (I couldn't pass them up in the market!).
We were slightly worried how this would come out.  As any good chefs, we try and taste the elements along the way; the rinds were bordering on too sour, the watermelon was cloyingly sweet, and the belly was very rich.  Fortunately, the sum was definitively greater than its parts--this was a delicious meal.  Calling it a salad doesn't do it justice.  The dressing, along with the mint and basil rounded it out with a clean, herbaceous taste.  There is a definite salty, sweet, and sour thing going on here that made you want to keep going back for another bite.  The chicharrones and sesame seeds gave it a nice crunchy textural component.   I strongly suggest getting a piece of pickled rind, the sweet watermelon, and the warm crispy pork all in one bite.  The flavors really pop in your mouth, and compliment each other nicely.  Take it from us, this is one summer dish that can't be missed!

February 20, 2013

Banh Who? Banh Mi!

Justin's been dying to cook something out of his Eat With Your Hands cookbook that I gave him for Christmas.  So when we got oysters in our share again this week, he jumped at the opportunity to make oyster banh mi.  If you're not familiar with this delicious Vietnamese sandwich, I'll break it down for you.  You start with a nice, crusty baguette, some kind of meat in the middle, pickled vegetables, and pate.  The baguette and the pate harken back to the French influence that once reigned over Vietnam.

So here's our version, ala Zakary Pelaccio...

We started by making a sambal aioli.  We toasted up some shrimp paste (belecan) to take some of the stinkiness out of it.  If you haven't experienced it, you can smell it from across the room, and its a pretty pungent smell.  But it adds a great flavor to dishes.  This was mixed with some chili garlic sauce and our homemade aioli.
For the pickled vegetables, we stuck with carrots and daikon, marinated in a bit of vinegar, fish sauce, honey and cayenne.  This added a bit of acidity, sweetness, and crunch to the sandwich.
The oysters were tossed in a bit of flour, cornstarch, salt and white pepper.  Then we dropped them into the hot oil to fry up.  They were ready in a matter of minutes.
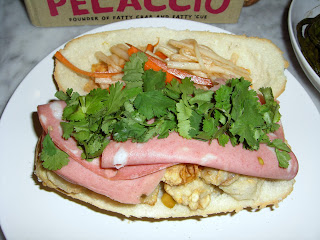
Then it was time to build the sandwich!  We toasted up the buns, and just like we did for our po' boys, I pulled out some of the bread from each side to make little troughs for everything to sit in.  The sambal aioli went on both sides of the bread.  On top of the oysters we laid a few slices of mortadella.  This replaced the traditional pate.  Then some fresh cilantro and some of the pickled veggies topped things off.  To drink, Zak recommended Asahi, but none of our local beer suppliers had bombers of it, and we forgot to pick one up at H-Mart, so we had to come up with an alternate drink pairing. We went with a Vietnamese-style iced coffee.  Since we only had regular coffee, we brewed some up, let it cool, and added it to some sweetened condensed milk.  It wasn't as strong as your typical Vietnamese iced coffee, but it did the trick!
Even though there were so many elements in one sandwich, the individual flavors came through, and played off each other nicely.  The oysters were sweet, the mortadella added a little saltiness, there was some spice from the aioli, acidity and crunch from the pickled vegetables, and freshness from the cilantro.  Not to mention the crusty, toasty bread.  It's definitely the best banh mi we've had in DC!

January 21, 2013

Tools of the Trade

I know its been almost a month since Christmas (where did the time go???), but I thought I'd go back and do another little recap.  But this time, I want to talk about the gifts Justin and I received.  Just about every present was food related, whether it was tools to add to our arsenal, cookbooks for inspiration, or random ingredients my mom found at a Hispanic market (I mean that Santa had his elves whip up in the shop).

So let's start with the equipment...
1.All-Clad 13 inch French skillet with lid.  I have a couple smaller All-Clad pans and they are awesome!
2. All-Clad Tool Set.  When mom asked what I wanted for Christmas, I didn't giver her much to work with. I just said that I needed a ladle.  So she came up with an entire tool set.  The one she found me is similar to the one pictured but also includes s slotted spoon and another spatula.
3. Salt box...though mine is currently holding pepper.
4. Iron Wok  Its made out of one piece of metal, so the entire thing gets hot, hence gift #9.  The wok made its debut when we made stir fry.
5. Granite Mortar & Pestle.  I still need to season it, but it should get plenty of use down the road.
6. Pirate Chef Apron.  Justin tends to be a little messy when he cooks.
7. Ceramic Mortar & Pestle.  It just so happens that Justin's parents had the same idea and got him a mortat & pestle too.  You may recognize it from our pig head post.
8. "Eat With Your Hands". This cookbook was listed as one of the top cookbooks of 2012.  My favorite part is that along with the recipes, Pelaccio gives recommendations for what to listen to and what to drink while cooking that recipe.  Justin has already read it cover to cover and is ready to start trying some of the recipes.
9. Silicone Pot Handle.  So the idea was for this handle cover to go with the wok.  Unfortunately, the handle of the wok is too thick for it to wrap around.  But I have another cast iron grill pan that we can use the handle on.
10. Gnocchi Paddle.  Now we won't have to use a fork to make the ridges!
11. 6-qt. Crock Pot.  Until now, I've just slow cooked things in my dutch oven.  But we broke her in by making some chili yesterday.

And then we unwrapped a few food items...
1. Squid Ink.  Santa brought both Justin and I a few packets of squid ink.  We're not sure how exactly we'll use the ink, but we've got some ideas in the works.
2. Bottarga.  If you're not familiar, this is cured fish roe.  The one that we got is mullet.  After our first experience with bottarga at the Feastly dinner, we're excited about using it ourselves.
3. Flavored Salts.  Not to be confused with bath salts...I don't think you'd want to snort or smoke these.  For Justin, I picked up the sriracha salt, roasted garlic salt, and aged balsamic salt.  They were so fragrant, you could smell them through the tins.  We sprinkled a bit of the roasted garlic salt onto our steaks.