A recent snow day afforded us the opportunity to really put our slow cooker to the test, and braise some short ribs for over 8 hours. The timing couldn't have been more perfect. I've been a bit hesitant to leave the crock pot plugged in while Justin and I are both away at work, so being snowed in was the perfect time to let these babies braise.
I'd seen this recipe come through my email, and we merged it with a short rib recipe from Nom Nom Paleo. Both recipes had similar ingredients in the braising liquids, so we thought it'd be easy to merge the two recipes.
We fired up the crock pot, and placed our seasoned short ribs inside. To that, we added some roughly chopped carrots, celery, white onion, green onion, a handful of garlic cloves, and some ginger. We also had some lemongrass on hand, so we added a bit of that to the crock pot too. For some added sweetness, we tossed in some gula jawa, as well as a few cloves of fermented black garlic that we had on hand.
For the braising liquid, we combined about 1/2 cup soy sauce, a splash of fish sauce, a touch of apple cider vinegar, 1 cup beef broth, and enough water to cover the top of the ribs. Then we just put the lid on, and let the ribs simmer the day away.
About halfway through, the aroma of the short ribs and braising liquid started to spread throughout the apartment, and it was hard to resist. We let them cook for a solid 8 hours. By the time we were ready to eat, the meat was so tender, it just fell off the bone and melted in your mouth. Be sure to skim off as much fat from the braising liquid before spooning it over your short ribs.
To accompany our short ribs, we whipped up some rice, and snow pea greens sauteed with garlic. The rice helped soak up some of the delicious braising liquid too, while the snow pea greens added a crisp, fresh component to the dish. The short ribs were garnished with some toasted sesame seeds. It was the perfect, hearty dinner for a wintery snow day.
Showing posts with label ginger. Show all posts
February 4, 2014
October 4, 2013
Simple Syrup -- Complex Flavors!
With some extra kaffir lime leaves from our pork belly, we thought we'd throw together some simple syrups to have on hand. They'll come in handy when we want to make cocktails. Plain simple syrups, just sugar and water, are easy ways to sweeten any drink, especially iced drinks. But throwing in some aromatics will make them even tastier.
We made 2 versions; kaffir lime and ginger, and just kaffir lime. To start, we combined equal parts of water and sugar, tossed in the aromatics in 2 separate pots, and gave them some heat.
You'll want to make sure all of the sugar dissolves, and then just let it boil.Once it's boiled for about 10-15 minutes, it should be ready. It'll be thicker, like a syrup, and coat your spoon. Then we just poured them into some mason jars, and let them cool with the lids off. Once they've cooled, we just popped them into the fridge for safe keeping.
They taste amazing, and I can't wait to mix them into some cocktails!
September 16, 2013
Magnificent Miso Mollusks
If you're looking for a quick weekday meal, look no further than some seared scallops. They don't take much time to cook up, and make for a very tasty meal. The sweet scallop is perfectly complimented by the salty and umami from the miso paste.
You'll want to start by patting your scallops dry.
Then we mixed up a marinade of miso paste, mirin, rice vinegar, ginger, and a touch of sesame oil. We used this recipe as a guide. We let the scallops marinate in the sauce for about 30 minutes while we prepped our sugar snap peas and toasted up some almonds.When you're ready to cook your scallops, get your pan nice and hot. Place your scallops in the pan, and let them get a nice, golden brown sear before flipping them. Searing them gives them not only a great taste but nice textural component as well. Be sure to keep your attention on the pan, they only take a few minutes to cook on each side.
We topped our scallops with some freshly chopped scallions, and had a nice little salad of mixed greens, sugar snap peas, and almonds. The outcome is a fresh, sophisticated, warm weather dish that looks as great as it tastes. That's it--quick, simple, and delicious!
Labels:
almond,
ginger,
mirin,
miso,
rice vinegar,
scallop,
sesame oil,
sugar snap peas
August 24, 2013
Get In My [Pork] Belly!
Despite having shelves of cookbooks and cooking magazines, we rarely take the time to flip through them and try out a recipe. But last night, we did just that. This summer we've gotten a watermelon in every share and we were running out of ideas (watermelon is to summer as cabbage is to winter in the CSA world). Justin had actually already spent an afternoon thumbing through Eat With Your Hands, flagging the recipes that piqued his interest, including a crispy pork belly and watermelon salad. It's not the first combination that comes to mind when I think of watermelon or pork belly, but let me tell ya...it's ridiculously good.
You'll want to start by pickling your rinds since they need to sit in the pickling juice for at least an hour. You can also do this up to 2 days in advance. Start by mixing your liquid:
2 c. rice vinegar (we only have about 1.5 c. rice vinegar, so we used white vinegar for the remainder)
3 shallots, thinly sliced (we only used 2, since ours were pretty big)
2 Thai bird chilies, thinly sliced (we used jalepenos instead)
2 fresh Kaffir lime leaves (we found ours at Whole Foods, but Asian markets have them too)
2 inches ginger, peeled and sliced
1.25 oz palm sugar or 1 round gula jawa or 2 tbsp light brown sugar
1 tbsp koser salt
Combine everything in a saucepan and bring it to a boil. All the flavors of the lime leaves, ginger, shallots and peppers will steep into the vinegar and sugar as it cooks. The sugar adds a much needed sweetness to help cut the tanginess of the vinegar. While your liquid is warming up, you can start slicing your rind. You'll want to cut the flesh of the watermelon away from the rind, and also remove the tougher, dark green skin, so that all your left with is the fleshy white part. You'll cut the rinds into cubes, and once your pickling liquid has come to a boil, and the sugar has dissolved, strain the liquid over your rinds. They can go into the fridge while you prepare everything else. You'll also want to cut the flesh of the watermelon into cubes, which can also go into the fridge to stay chilled until you're ready to serve it.
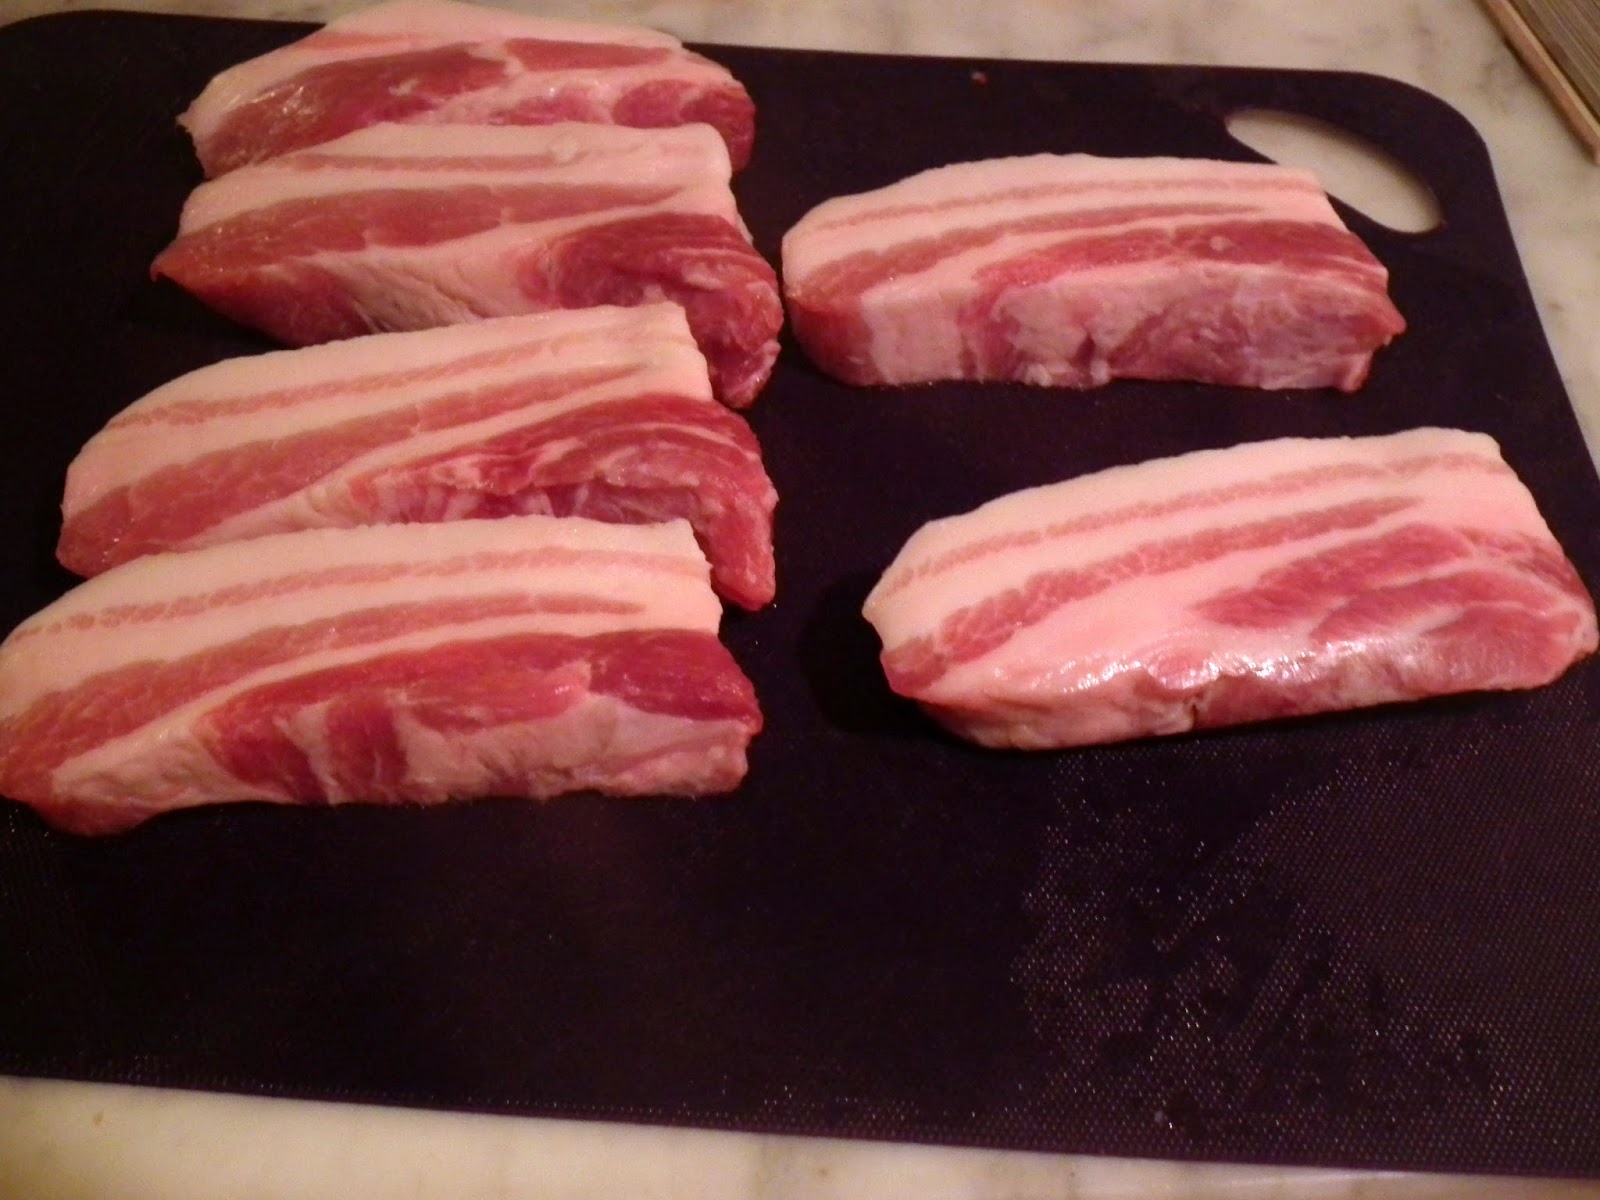
Now for the pork belly. The recipe tells you to fry your pork, but we decided to just render out the fat and braise it in my dutch oven. Just cut it into 1-inch chunks, and drop 'em in the dutch oven. We had about 1 1/3 pounds of pork belly, and it took 20-25 minutes for it all to render down and crisp up.
While your pork is cooking, you can make the dressing for your salad. In a food processor, combine:
3 oz. palm sugar or 2 rounds gula jawa or 1/4 c. light brown sugar
1 c. rice vinegar (we used Chinese cooking wine since we were out of rice vinegar)
1/2 c. fresh lime juice
4 inches fresh ginger, peeled and sliced
24 cilantro stems (use both the leaves and stems)
2 garlic cloves
3/4 tsp Kosher salt
Mix equal parts watermelon and pickled rinds, along with 2 sliced scallions, and freshly torn mint and Thai basil leaves (we used lemon basil instead). Pour enough dressing over the salad so it lightly coats everything. When your pork is done, divide it amongst your plates, and top each with the watermelon salad. Garnish with some sesame seeds, and in our case, some crumbled chicharrones (I couldn't pass them up in the market!).
We were slightly worried how this would come out. As any good chefs, we try and taste the elements along the way; the rinds were bordering on too sour, the watermelon was cloyingly sweet, and the belly was very rich. Fortunately, the sum was definitively greater than its parts--this was a delicious meal. Calling it a salad doesn't do it justice. The dressing, along with the mint and basil rounded it out with a clean, herbaceous taste. There is a definite salty, sweet, and sour thing going on here that made you want to keep going back for another bite. The chicharrones and sesame seeds gave it a nice crunchy textural component. I strongly suggest getting a piece of pickled rind, the sweet watermelon, and the warm crispy pork all in one bite. The flavors really pop in your mouth, and compliment each other nicely. Take it from us, this is one summer dish that can't be missed!
You'll want to start by pickling your rinds since they need to sit in the pickling juice for at least an hour. You can also do this up to 2 days in advance. Start by mixing your liquid:
2 c. rice vinegar (we only have about 1.5 c. rice vinegar, so we used white vinegar for the remainder)
3 shallots, thinly sliced (we only used 2, since ours were pretty big)
2 Thai bird chilies, thinly sliced (we used jalepenos instead)
2 fresh Kaffir lime leaves (we found ours at Whole Foods, but Asian markets have them too)
2 inches ginger, peeled and sliced
1.25 oz palm sugar or 1 round gula jawa or 2 tbsp light brown sugar
1 tbsp koser salt
Combine everything in a saucepan and bring it to a boil. All the flavors of the lime leaves, ginger, shallots and peppers will steep into the vinegar and sugar as it cooks. The sugar adds a much needed sweetness to help cut the tanginess of the vinegar. While your liquid is warming up, you can start slicing your rind. You'll want to cut the flesh of the watermelon away from the rind, and also remove the tougher, dark green skin, so that all your left with is the fleshy white part. You'll cut the rinds into cubes, and once your pickling liquid has come to a boil, and the sugar has dissolved, strain the liquid over your rinds. They can go into the fridge while you prepare everything else. You'll also want to cut the flesh of the watermelon into cubes, which can also go into the fridge to stay chilled until you're ready to serve it.Now for the pork belly. The recipe tells you to fry your pork, but we decided to just render out the fat and braise it in my dutch oven. Just cut it into 1-inch chunks, and drop 'em in the dutch oven. We had about 1 1/3 pounds of pork belly, and it took 20-25 minutes for it all to render down and crisp up.
While your pork is cooking, you can make the dressing for your salad. In a food processor, combine:
3 oz. palm sugar or 2 rounds gula jawa or 1/4 c. light brown sugar
1 c. rice vinegar (we used Chinese cooking wine since we were out of rice vinegar)
1/2 c. fresh lime juice
4 inches fresh ginger, peeled and sliced
24 cilantro stems (use both the leaves and stems)
2 garlic cloves
3/4 tsp Kosher salt
Mix equal parts watermelon and pickled rinds, along with 2 sliced scallions, and freshly torn mint and Thai basil leaves (we used lemon basil instead). Pour enough dressing over the salad so it lightly coats everything. When your pork is done, divide it amongst your plates, and top each with the watermelon salad. Garnish with some sesame seeds, and in our case, some crumbled chicharrones (I couldn't pass them up in the market!).
We were slightly worried how this would come out. As any good chefs, we try and taste the elements along the way; the rinds were bordering on too sour, the watermelon was cloyingly sweet, and the belly was very rich. Fortunately, the sum was definitively greater than its parts--this was a delicious meal. Calling it a salad doesn't do it justice. The dressing, along with the mint and basil rounded it out with a clean, herbaceous taste. There is a definite salty, sweet, and sour thing going on here that made you want to keep going back for another bite. The chicharrones and sesame seeds gave it a nice crunchy textural component. I strongly suggest getting a piece of pickled rind, the sweet watermelon, and the warm crispy pork all in one bite. The flavors really pop in your mouth, and compliment each other nicely. Take it from us, this is one summer dish that can't be missed!
June 13, 2013
Sear-iously Good Tuna
The items in this week's share really inspired this quick and easy dinner of sesame crusted seared tuna over bok choy and daikon. It didn't hurt that tuna was on sale at the grocery store either.
Start by mixing up a marinade for your tuna. We used soy sauce, sesame oil, honey, and some fresh ginger. Toss everything together, add your tuna, and let it sit while you prep everything else.
For the salad, we just chopped up some baby bok choy, sugar snap peas, and daikon. If you have a mandoline, that would be ideal for slicing the daikon. But if you're like us and don't have one, just try to slice the daikon as thin as possible.
For the dressing, we threw together some sesame oil, Chinese cooking wine, black vinegar, and a touch of honey. You could also use rice wine vinegar in place of the Chinese cooking wine and black vinegar, we just didn't have any on hand. So we improvised.
Now, back to the tuna. Once marinated, we seasoned it with some wasabi salt & pepper that we'd picked up from the Asian market, to add a little spice. But if you don't have any, you can season with salt and pepper. Then just roll it in your sesame seeds. We used a combo of black and regular. Place your tuna in a hot pan and sear it for a couple minutes on each side. We like it raw in the middle, so we didn't leave our tuna in the pan very long.
Then just slice up your tuna and arrange it on top of your salad. We topped ours with some freshly sliced scallions. It paired nicely with the Flying Dog green tea imperial stout that I happened to find at the grocery store that morning. Restaurant quality food in a matter of minutes. What more could you ask for?
Start by mixing up a marinade for your tuna. We used soy sauce, sesame oil, honey, and some fresh ginger. Toss everything together, add your tuna, and let it sit while you prep everything else.
For the salad, we just chopped up some baby bok choy, sugar snap peas, and daikon. If you have a mandoline, that would be ideal for slicing the daikon. But if you're like us and don't have one, just try to slice the daikon as thin as possible.
For the dressing, we threw together some sesame oil, Chinese cooking wine, black vinegar, and a touch of honey. You could also use rice wine vinegar in place of the Chinese cooking wine and black vinegar, we just didn't have any on hand. So we improvised.
Now, back to the tuna. Once marinated, we seasoned it with some wasabi salt & pepper that we'd picked up from the Asian market, to add a little spice. But if you don't have any, you can season with salt and pepper. Then just roll it in your sesame seeds. We used a combo of black and regular. Place your tuna in a hot pan and sear it for a couple minutes on each side. We like it raw in the middle, so we didn't leave our tuna in the pan very long.Then just slice up your tuna and arrange it on top of your salad. We topped ours with some freshly sliced scallions. It paired nicely with the Flying Dog green tea imperial stout that I happened to find at the grocery store that morning. Restaurant quality food in a matter of minutes. What more could you ask for?
May 29, 2013
Summertime Sweets
Tonight's dinner was super simple...we threw some steaks on the grill and mixed up a simple salad (for those of you at home playing the 2 Hungry Hearts drinking game, take a drink every time we make a simple salad) of green leaf lettuce and sliced fennel...all items from our share. We topped the salad with some toasted walnuts, and dressed it with olive oil, white balsamic vinegar, some thyme and fennel fronds. The sweetness of the white balsamic balanced out the fennel quite nicely.
But let's get on to the main event. If you thought the salad and steak were easy, wait till you feast your eyes on this dessert. It couldn't be simpler!
We only had 2 stalks of rhubarb, so we tossed in some quartered strawberries too. Strawberries and rhubarb are a winning combination; the sweetness of strawberries balancing out the tartness of rhubarb. Since we had the strawberries, we just cut out some of the sugar the recipe called for. Anyway...just chop up the rhubarb and strawberries, and toss with a bit of lemon juice and sugar.
In a separate bowl you'll make the topping. Rather than just use panko, as the recipe calls for, we also threw in some oats, along with cinnamon, nutmeg, ground ginger, and some Chinese five spice, since we didn't have allspice on hand.
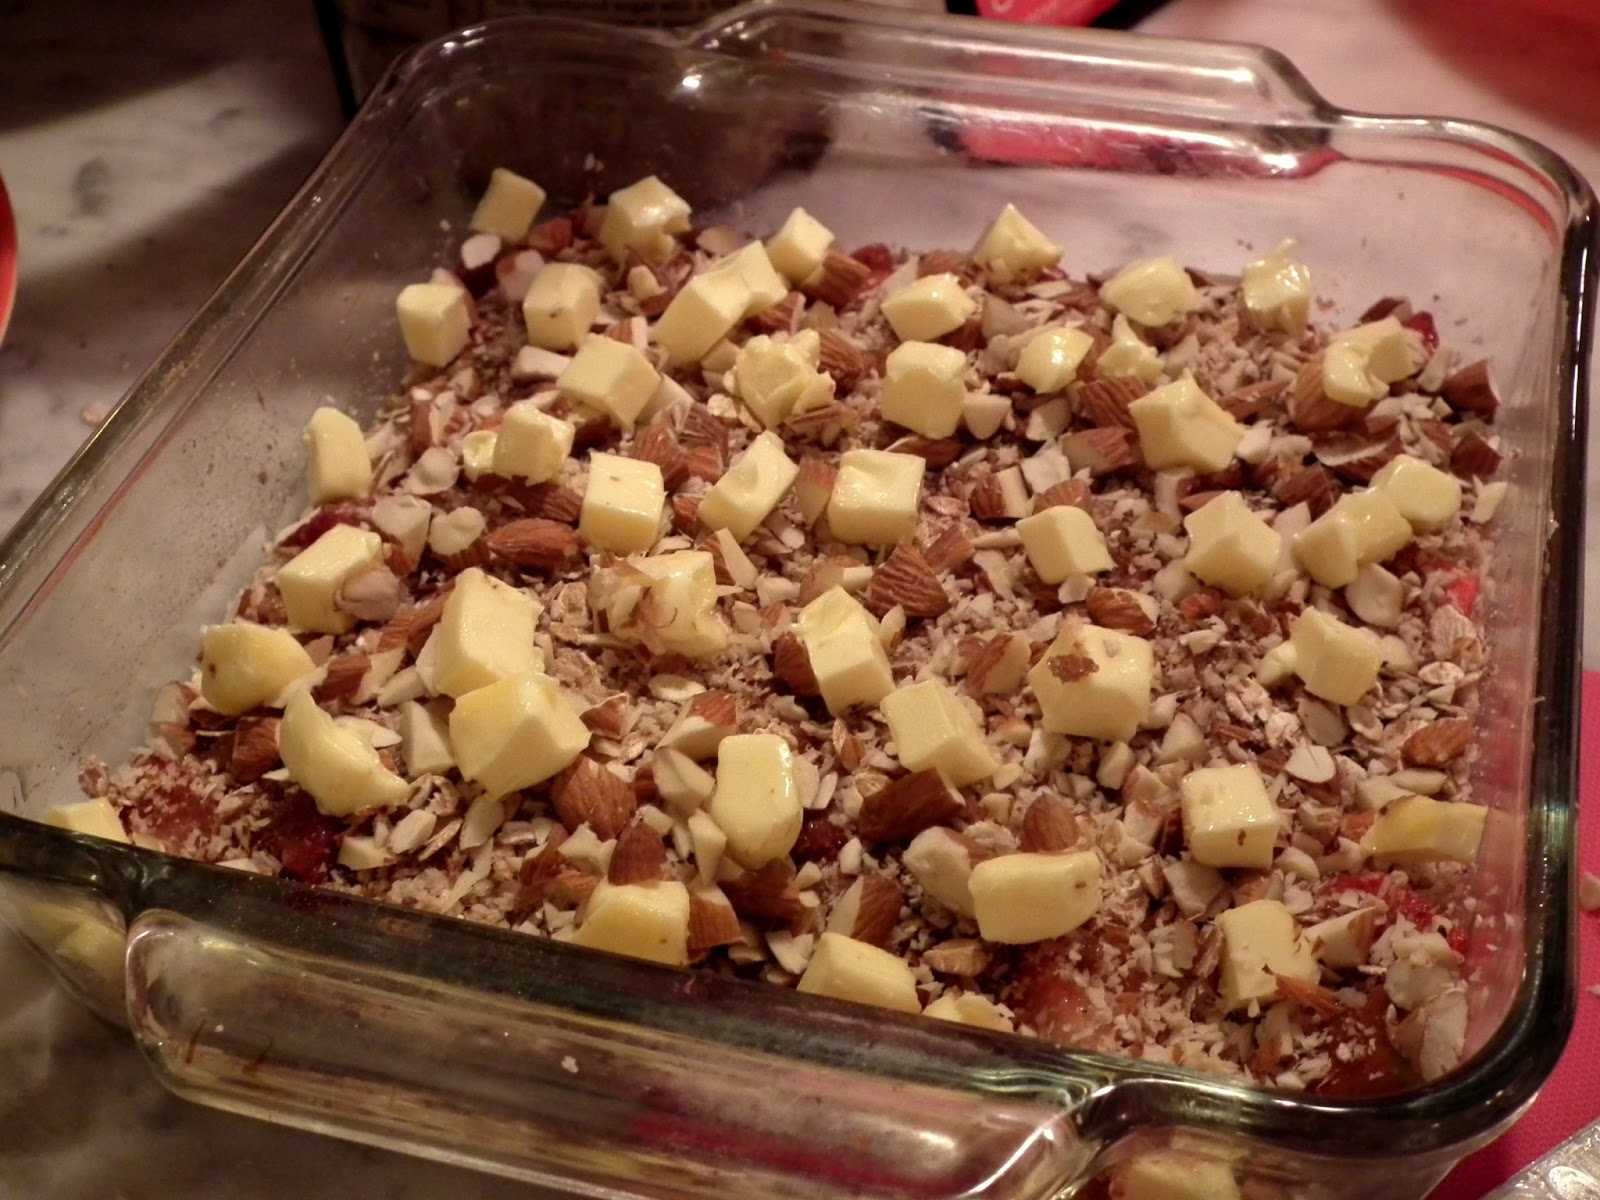
Butter the bottom of your baking dish, and spread some of your topping on the bottom to make a nice little crust. Then layer on your strawberries and rhubarb so they're evenly distributed. Top it off with the rest of your topping, along with your chopped almonds. Then cube up some butter and dot the top. Make sure the butter is spread out evenly too, so it melts over the whole dish.
Then just pop it into a 350 degree oven for about 20 minutes. You want the filling to start to bubble, and the top to be golden brown and crisp. Let it cool for a few minutes, and then dig in! As our friend Jeffrey Zakarian would say, "Yummy!"
But let's get on to the main event. If you thought the salad and steak were easy, wait till you feast your eyes on this dessert. It couldn't be simpler!
We only had 2 stalks of rhubarb, so we tossed in some quartered strawberries too. Strawberries and rhubarb are a winning combination; the sweetness of strawberries balancing out the tartness of rhubarb. Since we had the strawberries, we just cut out some of the sugar the recipe called for. Anyway...just chop up the rhubarb and strawberries, and toss with a bit of lemon juice and sugar.
In a separate bowl you'll make the topping. Rather than just use panko, as the recipe calls for, we also threw in some oats, along with cinnamon, nutmeg, ground ginger, and some Chinese five spice, since we didn't have allspice on hand.
Butter the bottom of your baking dish, and spread some of your topping on the bottom to make a nice little crust. Then layer on your strawberries and rhubarb so they're evenly distributed. Top it off with the rest of your topping, along with your chopped almonds. Then cube up some butter and dot the top. Make sure the butter is spread out evenly too, so it melts over the whole dish.
Then just pop it into a 350 degree oven for about 20 minutes. You want the filling to start to bubble, and the top to be golden brown and crisp. Let it cool for a few minutes, and then dig in! As our friend Jeffrey Zakarian would say, "Yummy!"
May 13, 2013
Strawberry Shortcake
When it comes to desserts, I'm much more apt to choose a fruit-based dessert over some decadent chocolate delight. For one, chocolate, especially rich, dark chocolate, makes me sneeze. And I just prefer a lighter, less sweet dessert. So what better way to use our quart of strawberries, than to make a strawberry shortcake?
It was perfect timing because Justin received an email from Food & Wine with their 20 top strawberry recipes, which included a shortcake recipe. It came together pretty quickly, and in no time, we were chowing down on dessert.
Justin took care of the strawberries, slicing them in half, and macerating them with some sugar, orange zest, and grated ginger. The orange and ginger were our added twists, and added some brightness to our strawberries.
As for the shortcakes, mix the cake flour, baking powder, and salt together. Using your fingers (or a pastry blender if you have one), mix in the cold butter. Once the butter is incorporated, add in your cream, and mix with a knife until the dough clumps together.
At this point, the recipe has you pat the dough into a round cake pan, but we decided to make individual little shortcakes. Once you form them to your desired size, place them on a baking sheet, brush on a bit of cream, and sprinkle a little sugar on top. Then just pop 'em in the oven at 425 degrees for 20 minutes, or until they're golden brown on top.
While your shortcakes are cooking, you can make your whipped cream. In a bowl you'll need your cream, some vanilla, and some sugar. If you want a good arm workout, you can whip it by hand, but we opted for the hand mixer. In less than 5 minutes, we had some delicious, homemade whipped cream.
Once the shortcakes have cooled a bit, slice them in half horizontally, spoon on some strawberries and whipped cream, and top with your shortcake cap. We also added a bit or orange zest to garnish.
It was perfect timing because Justin received an email from Food & Wine with their 20 top strawberry recipes, which included a shortcake recipe. It came together pretty quickly, and in no time, we were chowing down on dessert.
Justin took care of the strawberries, slicing them in half, and macerating them with some sugar, orange zest, and grated ginger. The orange and ginger were our added twists, and added some brightness to our strawberries.
While your shortcakes are cooking, you can make your whipped cream. In a bowl you'll need your cream, some vanilla, and some sugar. If you want a good arm workout, you can whip it by hand, but we opted for the hand mixer. In less than 5 minutes, we had some delicious, homemade whipped cream.
Once the shortcakes have cooled a bit, slice them in half horizontally, spoon on some strawberries and whipped cream, and top with your shortcake cap. We also added a bit or orange zest to garnish.
It was so easy, and so delicious. It's the perfect summer dessert! The hardest part was waiting for the shortcakes to cool!
Labels:
butter,
dessert,
ginger,
oranges,
shortcake,
strawberry,
vanilla,
whipped cream
April 26, 2013
Paleo Shake-n-Bake...and I helped!
We had some umami dust leftover from our burgers, so we decided to jump a little outside the box, and try it on some pork chops.
Let's start with the cauliflower. It wasn't too different from when we made the kimchi brussels sprouts. The cauliflower was chopped up into more manageable, bite-sized pieces, and we crisped up some pancetta bits. We poured a bit of the rendered fat over the cauliflower before popping it into the oven to roast.
Once the cauliflower was a bit charred, we pulled them out of the oven, and tossed them with the crisped pancetta, sliced kimchi, and some freshly sliced green onion.
To finish the dish, we placed our chop on a bed of creasy greens, lightly dressed in some rice wine vinegar, a dash of black vinegar, garlic, ginger and sesame oil. The greens added a bit of acidity to the umami chops, while the roasted cauliflower added a nice kick of spice.
Let's start with the cauliflower. It wasn't too different from when we made the kimchi brussels sprouts. The cauliflower was chopped up into more manageable, bite-sized pieces, and we crisped up some pancetta bits. We poured a bit of the rendered fat over the cauliflower before popping it into the oven to roast.
Once the cauliflower was a bit charred, we pulled them out of the oven, and tossed them with the crisped pancetta, sliced kimchi, and some freshly sliced green onion.
Now, onto the pork chops. Since we can't use panko or bread crumbs, we used some unsweetened, shredded coconut, and mixed some of the umami dust, minced garlic and ginger, and some black and regular sesame seeds
Then we just coated the chops in the mixture, and popped them into the broiler on some cooling racks. Doing that allows the air to circulate around the chops, so all sides get crispy. If you just place them on the baking sheet directly, the bottom will end up soggy.To finish the dish, we placed our chop on a bed of creasy greens, lightly dressed in some rice wine vinegar, a dash of black vinegar, garlic, ginger and sesame oil. The greens added a bit of acidity to the umami chops, while the roasted cauliflower added a nice kick of spice.
Labels:
cauliflower,
chop,
coconut,
creasy greens,
garlic,
ginger,
kimchi,
Paleo,
pancetta,
pork,
umami
Subscribe to:
Posts (Atom)