Showing posts with label green onion. Show all posts

January 5, 2014

Everybody Loves Ramen!

We've had some cold weather around these parts, and a freezer full of turkey meat and turkey stock. So to kill two birds with one stone and use up our turkey, and warm our bellies, we decided to try our hand at making our own ramen.  We transformed this American fall classic into a Japanese-influenced cold weather delight.

To our basic stock, we added some mirin, garlic, soy sauce, and some white pepper.  Since our stock was pretty thick, we also added some water to give it the right consistency.  Let it simmer and reduce to about half.  We also threw in some of the shredded turkey we had on hand.
Once your broth has reduced, throw in your noodles.
Once they started to soften, we added in our chopped baby bok choy and some sliced scallions.  We wanted to keep some crunch to the bok choy, so we added them at the end.  If you want them to soften more, you can add them earlier.
Once the noodles are al dente, you're ready to serve!  We topped our ramen with some strips of nori for some added umami punch.
It was a nice and hearty bowl of soup, perfect for a cold winter's day!  It was a great change of pace from other turkey leftovers, and the flavor was comparable to the real thing.  Look for us to try a more traditional tonkotsu ramen in the future.

April 25, 2013

CSA Recap

Helloooo!  Apologies to our loyal followers...I know we've been a bit silent over the last couple weeks, and that was not intentional.  Justin and I were over in China for the last couple weeks, and had been planning to post a few things while we were gone, until I was reminded that China blocks Google and blogs.  Whomp!  Whomp!  We'll have a recap of some of the delicious things we ate while we were traveling, but I still need to get settled back in first.  So let's pick up where we left off...our CSA recap...
And here's how we used everything...
We ended up just eating the peanuts while watching some basketball, and the potatoes were used for some home fries for a weekend breakfast.  We'll get back on track with our regular posts...promise!

April 10, 2013

Welcome to the Tropics

Now that the weather is really warming up, it's time to start cooking with spring/summer fruits and veggies.  We got things started with some pork chops topped with mango salsa.

Here's my trick for cutting a mango.  The seed in the middle is typically pretty wide, but not very thick.  So, start by slicing off the sides.

Then, score your two sides into whatever size cubes you like.  You don't want to cut all the way through the skin though.  Then flip it inside out.
Now, all you have to do is is run your knife through the bottom of your chunks to separate them from the skin.  To finish off the salsa, we added some sliced green onion, red onion, cilantro, and some lemon.
Give it a good stir, add a little salt and pepper, and you're good to go!  This would also be great with a little cucumber or some avocado, and some jalepeno if you want a little heat.

For the pork chops, we simply seasoned them with salt, pepper, cayenne, and a little grapeseed oil, and stuck them under the broiler for a few minutes on each side.  You'll want to keep an eye on them so they don't overcook and become tough.  And to finish off the meal, we had a simple salad, lightly dressed with some lemon juice, grapeseed oil, a drop of maple syrup, salt and pepper.

April 2, 2013

CSA Day AND Chicken Marsala

That's right...you're getting a two for one deal tonight!  So let's get things started.

Here's what we hauled in today...
We're really excited about this whole chicken.  The peanuts and potatoes will be a little trickier since they are both off limits with the Paleo diet, but since we allow ourselves one cheat day, we'll find a way to incorporate them into meals then.

Now...for tonight's dinner, we whipped up some chicken marsala and roasted turnips.

We started by making a "marinade" for the chicken.  I use that term loosely since it wasn't your typical saucy marinade, but that's how the recipe phrased it, so that's what I'm sticking with.  We started by slicing and dicing some green onion (since we didn't have shallots), white onion, garlic, thyme, rosemary (our little twist), and sage, and adding in a bit of grapeseed oil.  Then we layered in our chicken, making sure each piece was nicely covered in the aromatics.
The recipe says to cut your chicken into chunks, but we went more with cutlets.  So I stacked them up, making sure to get the onions and herbs in between each piece, and let them sit for about 10 minutes while we prepped the turnips.  We kept them simple and just roasted them up, similar to how we did the cauliflower here.  Once the chicken had a chance to marinate, we browned them in a pan, and then popped 'em into the oven just to stay warm (so turn your oven no higher than 200).

Using the same pan, we added the remaining onions and herbs to the pan to soften, and then added in the mushrooms.  We used both the oyster and shitake mushrooms that we picked up in our share.
Once the mushrooms have cooked down, add in your marsala wine to deglaze the pan.  Be sure to scrape up all the delicious brown bits that may be stuck on the bottom of your pan.  If you use a non-stick pan like we did, you won't have to worry about those stuck-on bits.

Once the alcohol has cooked off, add in your chicken stock.  Give everything a good stir, and be sure to season your sauce with salt and pepper.  Then you just let it simmer and reduce for about 10 minutes.  Up until this point, it was Paleo-friendly.  But we had to add a tiny bit of cornstarch to thicken the sauce.  The recipe called for arrowroot as the thickening agent, but we didn't have any on hand.  Considering there was only about 1/2 tsp of cornstarch, I'm going to say this was still Paleo-friendly.

Once your sauce has thickened to your desired viscosity, you can toss your chickens in so they can absorb some of the sauce.  Then you're ready to serve!

April 1, 2013

CSA Recap

Happy April!  It's time once again for our CSA recap.  Here's what we picked up...
And here's how we put the deliciousness to use...
We ended up just eating the apples as snacks/part of our lunches, and the bacon is in the freezer since we still have some from the last share that we need to eat.  Stay tuned tomorrow to see what we pick up next!

March 25, 2013

It's a Wrap!

On a cold, rainy night like tonight we were looking for a quick, easy, healthy, tasty, and comforting meal.  We were hungry for some delicious pot stickers like we had at Chinese New Year, but we wanted to keep it Paleo, and use some of our share ingredients, so decided to make some Asian lettuce wraps.

Essentially, we used the recipe for the pot sticker filling.  We started by mincing up some ginger, garlic, and scallions.  
That was all mixed with some ground pork, salt, white pepper, sesame oil, a little soy sauce, and a dash of Chinese cooking wine.  Next we chopped up our shitakes from the share, and tossed it all together.
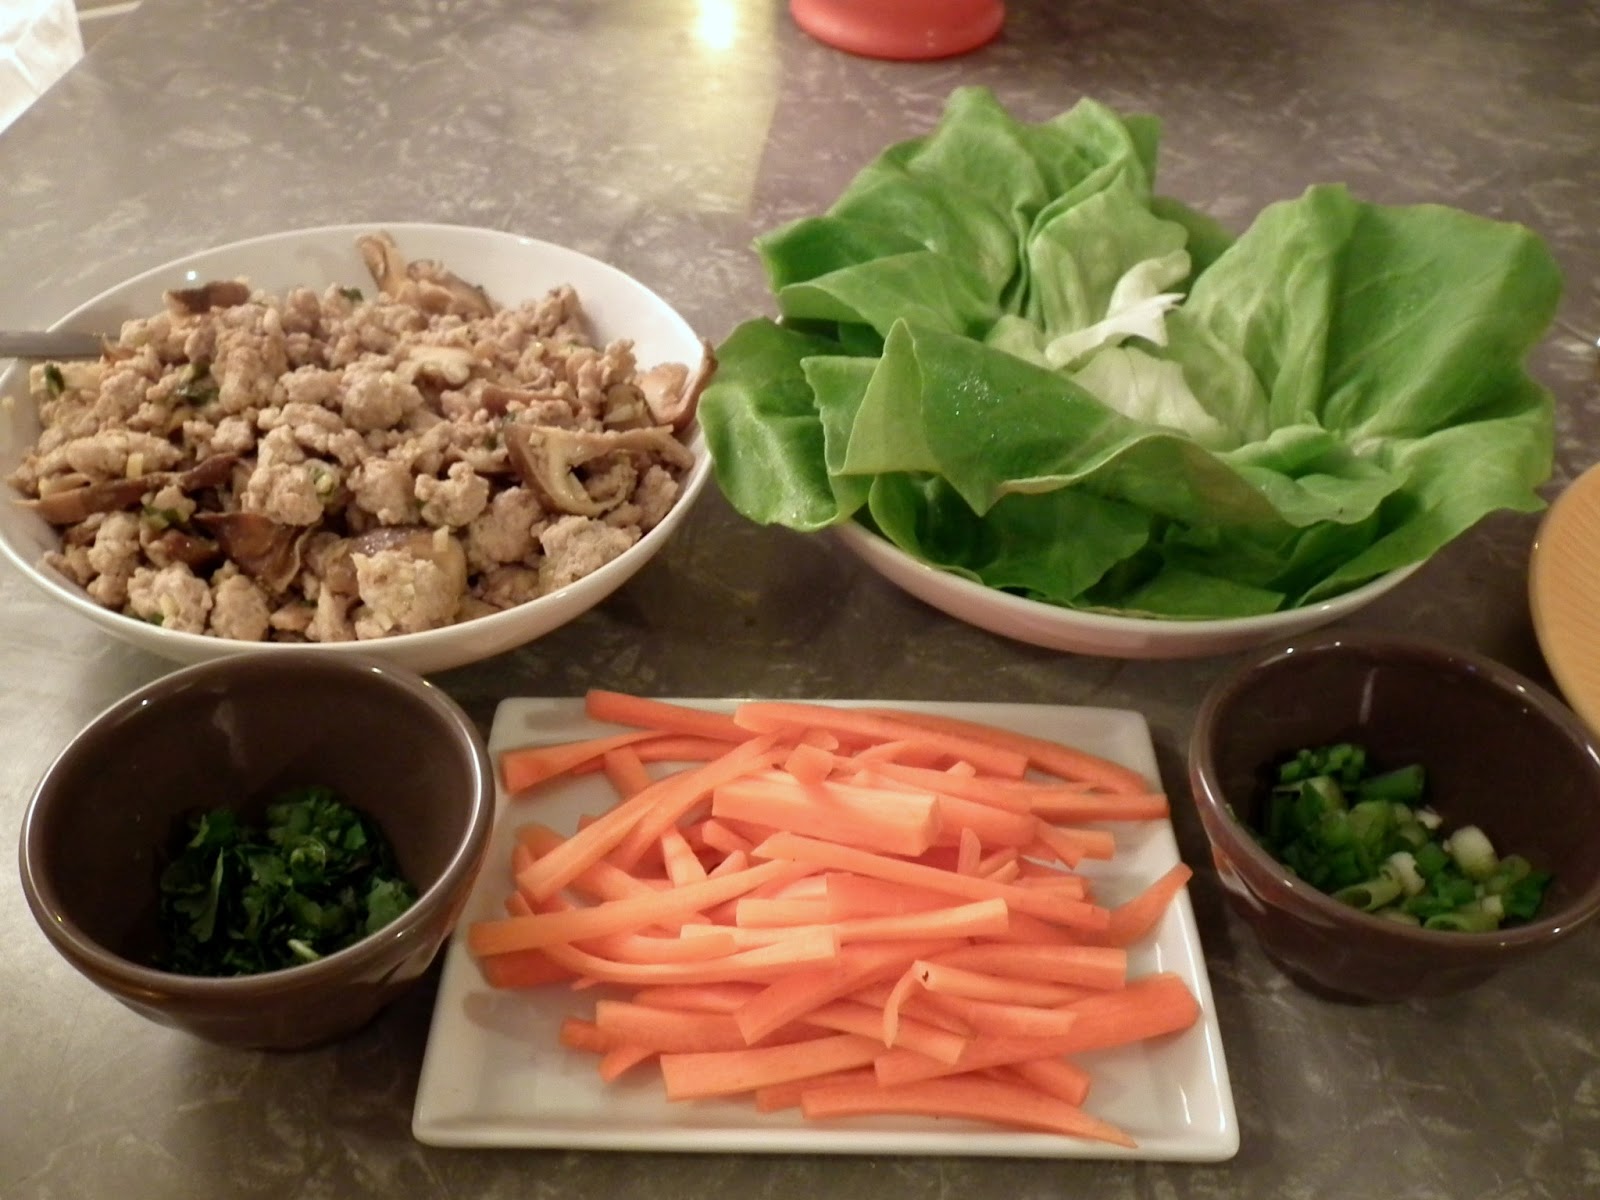
We cooked the mixture in a pan with a bit of coconut oil, and it was ready in no time.  While that cooked, we julienned some carrots to wrap up in the lettuce, and chopped up a little more green onion, and some cilantro to garnish.

We tore the leaves from the head of bibb lettuce to use as our wraps, and set up a little station to build our wraps.  Just spoon in some pork and mushrooms, add a few carrot sticks, top with some green onion and cilantro, and you're good to go!


March 22, 2013

Chicken & Kale Curry

It's always tough for me to get motivated to cook dinner on a Friday night.  I'm usually tired from the work week, and would rather just go out or order in.  But we're watching what we eat, and it can be difficult when you go out since you don't have complete control over what goes into your food.  Luckily we found a simple recipe for a chicken and kale curry.  I don't think it took us more than 30 min. to throw this bad boy together.

Start by mixing together your spices; curry powder, tumeric, coriander, ginger, salt & pepper.  I didn't have any dried ground ginger on hand, but I did have a jar of wet ground ginger in the fridge, so we used that instead.  And instead of black pepper, we used white pepper, which is often found in Asian cooking.  Then just toss in your hunks of chicken and evenly coat them with your spice blend.  You can let it sit and marinate while you prep your veggies.
Speaking of veggies...you'll need to dice up an onion and some tomatoes, and de-rib your kale.  To make it even easier, you could just use grape or cherry tomatoes and toss them in whole.  But we had the tomatoes from our share, so they just got diced up.
Once that's done, heat your pan with a bit of coconut oil.  If you don't have any, you can use whatever oil you have on hand.  But the coconut oil helps impart a subtle coconut flavor on the dish.  Toss in your onions and let them cook for a few minutes, until soft.  Then throw in the chicken and let it brown up.
Once the chicken is browned, add in the kale and let it wilt down.  It should only take a few minutes.  Then you can add in your tomatoes.  Once the tomatoes have had a chance to cook down a bit, you can add your coconut milk.  This will thicken as it simmers, and becomes your sauce.
At this point, we tasted everything and decided to add a dash of cayenne for some heat, and a little more salt.  Once the sauce has thickened to your liking, you're ready to serve!  We topped it all with a little green onion and called it a night.
Using the coconut milk, as opposed to coconut cream, let the spices be the star of the show.  The coconut was very subtle, while still adding nice flavor to the dish overall.  It's a great, quick, Paleo-friendly meal that we'll be adding to our rotation.

March 18, 2013

CSA Recap

I know we've been a bit M.I.A. these last couple weeks, and we kind of fell off our Paleo wagon.  But with a new share coming our way tomorrow, we're ready to re-focus and get back on the Paleo train.
Here's what we made with our last share:
We still have an apple, a few green onions, and a couple potatoes left, but I'm sure we'll find a way to incorporate them into some upcoming meals.

March 11, 2013

Homemade Kimchi

You've heard us talk about our homemade kimchi a few times (here and here), and we're finally spilling the beans on how we made it.

We used this recipe, given to us by my cousin, that came from The Lucky Peach.

We just had a head of regular green cabbage on hand, rather than the suggested napa cabbage, but from our previous experience, the green cabbage worked just as well.  Start by chopping your cabbage into big hunks.  You'll season liberally with salt and sugar, and let it sit in the fridge overnight.


Next, you'll want to whip up the seasonings.  In a food processor, puree the garlic, ginger, soy sauce, Korean chili flake, fish sauce, and brine shrimp.
Once that's formed a nice paste/sauce, dump it over your cabbage, carrots and green onion.  We also added some daikon to the mix.  Here's where you'll want to get in there with your hands to make sure the spice mixture gets into all the nooks and crannies of the cabbage.
Once everything is good and mixed, you'll want to stuff everything into a clean glass jar that can be sealed air tight.  We used the jars we picked up from Ikea, that we've also used for our sauerkraut.  Stuff as much of the cabbage as you can into the jar.  If you don't have a jar, you can also use a plastic container with a lid.  In our first attempt at making kimchi, we went this route, and it came out great!  The key is to make sure that the cabbage is packed in as tightly as possible, and no air can get in.
Then you just place it in the fridge and let it ferment.  After a week or so, it'll be ready to go!

March 9, 2013

Whole Roasted Chicken

Tonight we tackled a whole roasted chicken for dinner.  It may seem like a daunting task, but in reality, the oven does all the work.  We ventured over to Trader Joe's to pick up some groceries for the week, and picked up our bird.  The nice thing is that they have whole organic chickens that are already brined.  Whether you brine it yourself or buy a pre-brined bird, brining is the way to go.  It helps keep the meat really moist and delicious.
So once we got our bird home, Justin got to work on him, giving him a nice rub down with some butter and Kosher salt, making sure to get some of the butter under the skin as well.  Despite the brining, you still want to liberally salt the skin.  This too will help keep him moist.  And the butter helps brown the skin so it's nice and crispy.


While Justin was massaging the chicken, I got to work chopping up all the veggies to make a nice little bed for him.  We went with leeks, celery, half an onion, and some carrots.


I also got together the aromatics that we stuffed into the cavity of the bird.  These included a whole lemon, sage, rosemary, thyme, garlic, and half an onion.  Then you just stuff it all inside the cavity.
Once everything is stuffed inside, you want to close the cavity by tying the drumsticks together.  We'd consulted Ruhlman's Twenty prior to roasting to see what Mr. Ruhlman suggested, and to keep the meat moist, he recommended either stuffing the cavity or closing the cavity (he also recommended the liberal use of salt).  Doing so prevents the hot air from circulating through there and drying the meat out from the inside.  We figured we'd do both, to keep the meat moist, and add some additional flavors.
Once he was all tied up, we placed him on his bed of veggies so he was nice and cozy, and placed him in a 450 degree oven for about 45 minutes.  Justin has a convection oven, so he cooked a bit faster than if we were using my regular oven.  If you want to check your bird, the telltale sign of doneness is when the juices run clear.  After about 45 minutes, our bird was pretty much done.  We wanted to crisp up all of his skin, so we flipped him, and put him back in the oven for about 10 minutes.
Mmmm...look at that delicious, golden brown, crispy skin!  Just like any other meat, you'll want to let your chicken rest for a good 10 minutes before you start carving him.  So while our guy rested, I added a little butter, and some fresh thyme, sage, rosemary, and fresh cracked pepper to the veggies.  I also took a wedge of lemon that had been in the cavity, and squeezed some of the juice over them.  Then it was time to eat!
The meat was so juicy and moist, with hints of the lemon and herbs that we'd stuffed inside it.  The skin was perfectly crisp with just a hint of salt.  The veggies still had some bit to them, and were a perfect complement to the bird.  We also baked up a sweet potato and topped it with some pancetta and green onion.  So if you're looking for an easy, one pan meal, you should definitely try roasting a whole chicken.  Plus you'll have leftovers for later in the week!